

Attention! Even if your online store runs on Shoptet, it does not necessarily mean that your DNS (name records) are managed by Shoptet as well. If that is not the case, this guide does not apply to you, and you should refer to the instructions provided by your DNS provider instead.
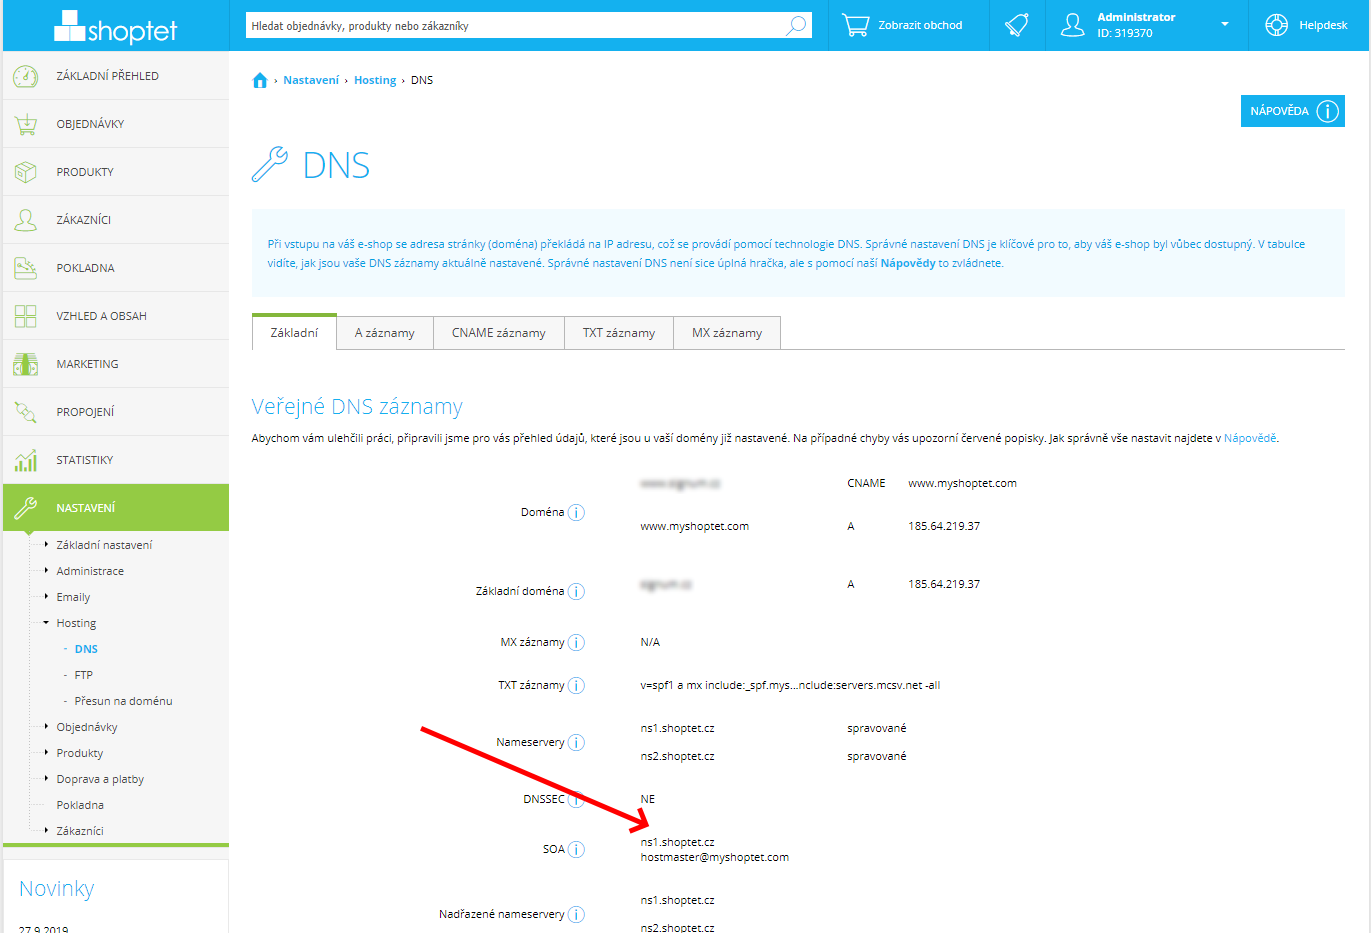
Open your store administration, then go to Settings / Hosting / DNS. You should see something similar to the following screenshot. If you do not see references to shoptet.cz, especially in the SOA record, then Shoptet does not manage your domain and this guide cannot be used. Otherwise, continue.
SPF (Sender Policy Framework)
Click on the “TXT records” tab. If you see the same value in the “Text” column as shown in the following image, you can delete the record (the icon on the right will appear when you hover your mouse over it).

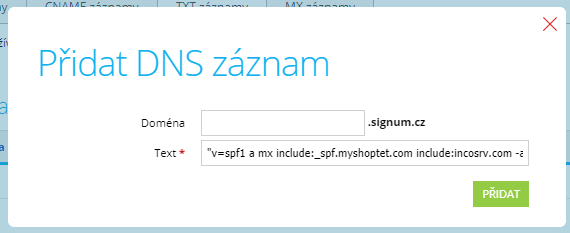
After deleting it, click the blue “Add” button in the top right corner. In the dialog that appears, leave the “Domain” field empty and paste the following text into the “Text” field, then click “ADD.”
"v=spf1 a mx include:_spf.myshoptet.com include:incosrv.com ~all"
DKIM (Domain Keys Identified Mail)
Now you need to log into your Incomaker account, click on the main “Campaigns” tab, and in the left-hand menu click on “DNS settings.” Alternatively, you can go via Overview / My proposals / DNS settings.
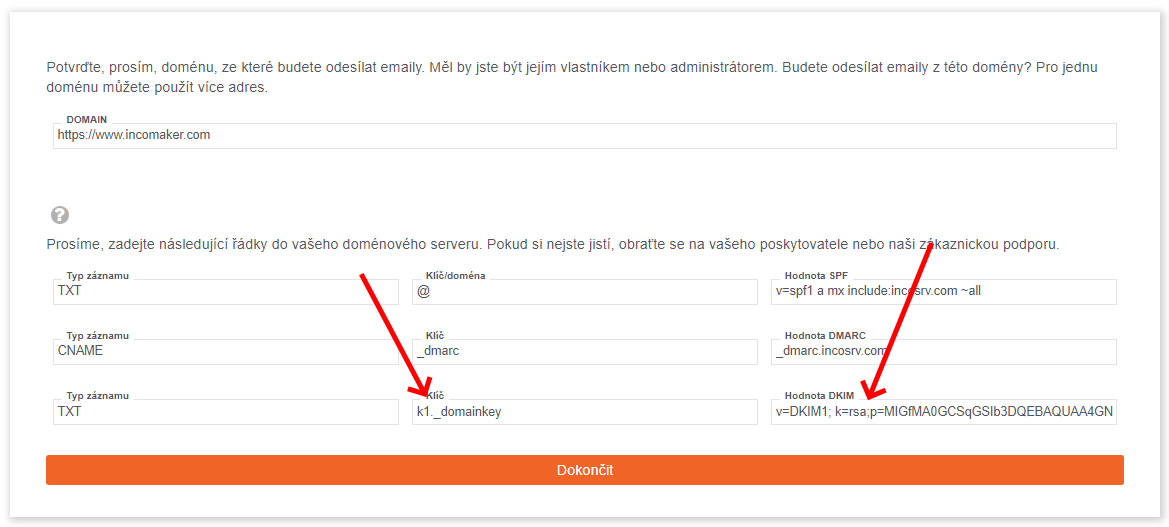
We are interested in the last row.
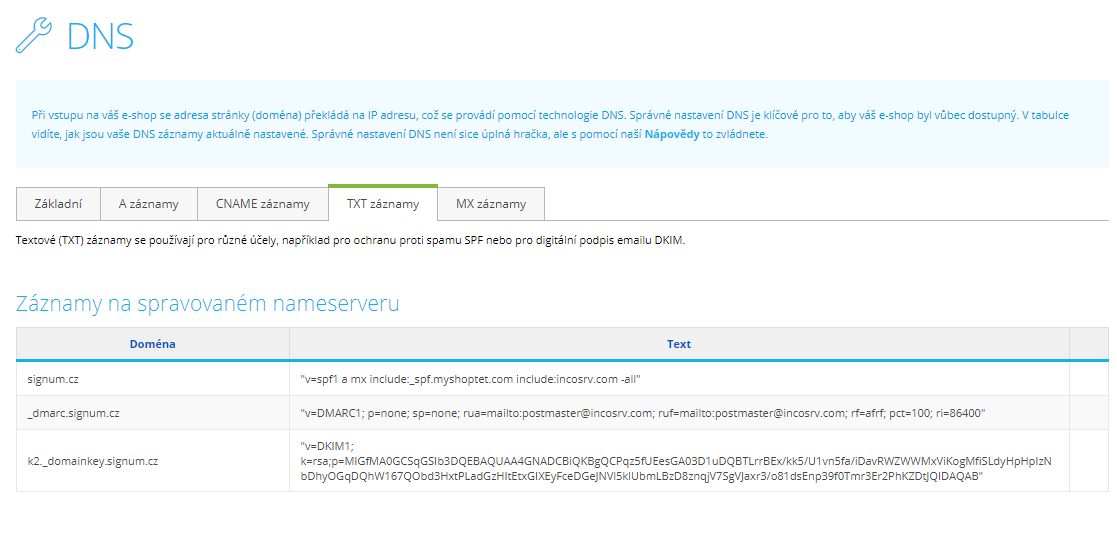
Switch back to Shoptet and again click the blue “Add” button in the top right corner. In the “Domain” field, copy exactly the text that is in Incomaker in the “Key” field, and in the “Text” field (in Shoptet), paste the value from “DKIM value,” then click “Add.” In Incomaker, click “Finish.” The result should look roughly as follows:

DMARC (Domain-Based Message Authentication, Reporting and Conformance)
We are still in the “TXT records” tab and again click the blue “Add” button in the top right corner. This time, in the “Domain” field, we enter:
_dmarc
In the “Text” field, you enter the following and click “Add.” A third record will appear on the screen.
v=DMARC1; p=none; sp=none; rua=mailto:postmaster@incosrv.com; ruf=mailto:postmaster@incosrv.com; rf=afrf; pct=100; ri=86400
That completes the setup. It may take some time for the changes to take effect, but within about an hour, you should be able to send emails safely.
If you are having trouble with the setup, please contact our support, for example via the chat in the bottom right corner—we will be happy to help you.
Bounce domain settings
Go to the “CNAME records” tab and click the “Add” button.
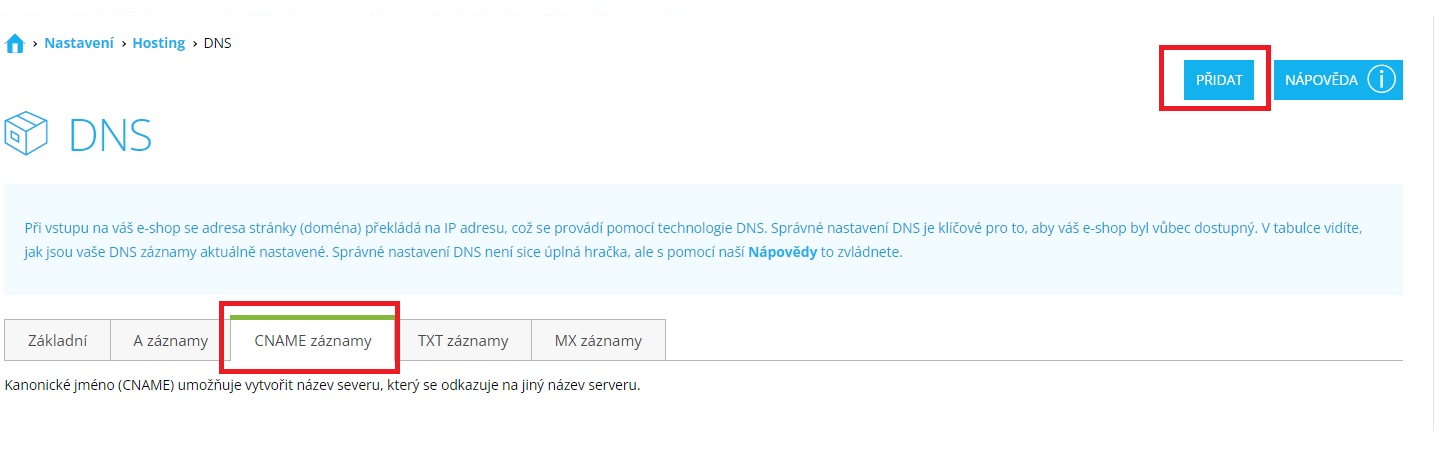
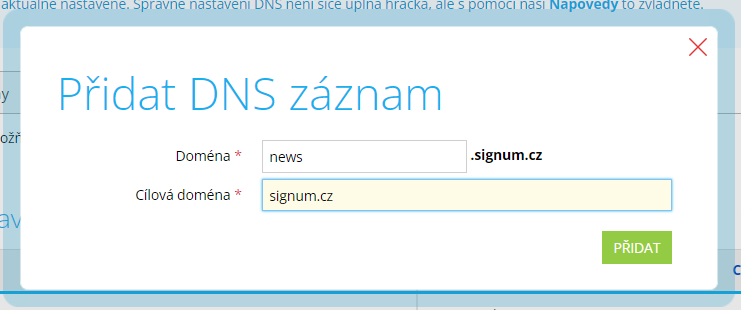
In the window that opens, we first set the bounce domain for the SPF record. In the “domain” field, enter “news” and in the “target domain” field, enter the name of your email domain; in our case, it is “signum.cz”. Confirm by clicking “Add.”
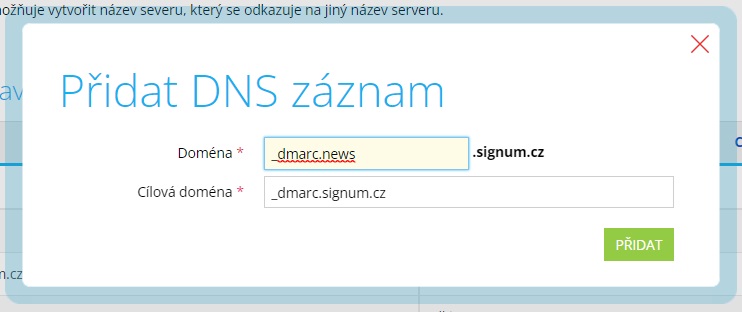
Click the “Add” button again, and this time we will create a bounce domain for the DMARC record. In the “domain” field, enter “_dmarc.news” and in the “target domain” field enter the DMARC record created in the previous steps; in our case “_dmarc.signum.cz”. Again, confirm by clicking “Add.”
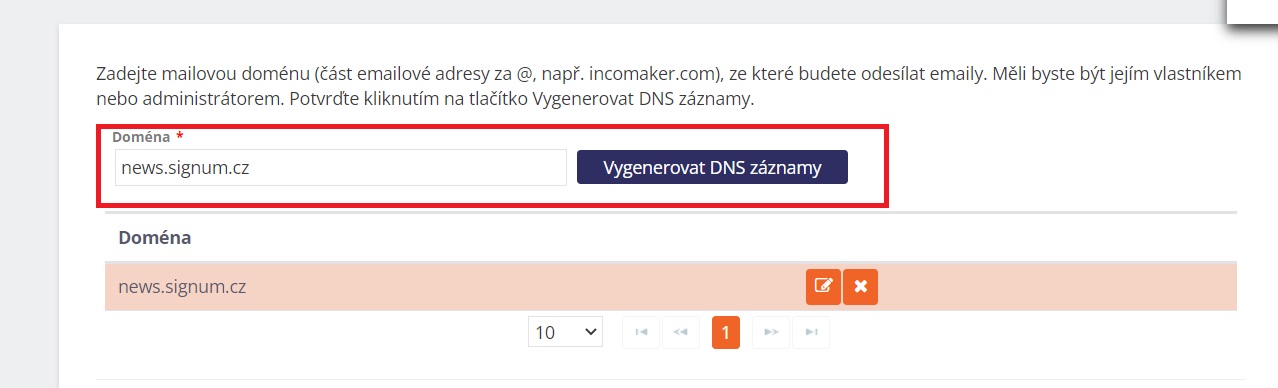
Finally, we will set the bounce domain for the DKIM record, which is done a bit differently. First, in Incomaker, in the “Campaigns” tab, expand the “Settings” menu in the left-hand panel and select “DNS settings.”
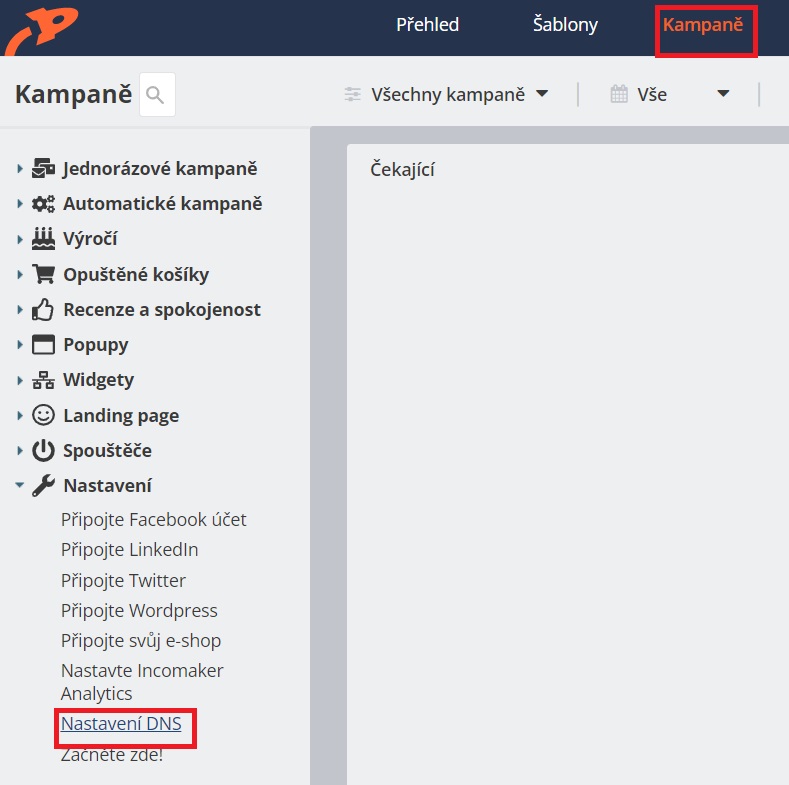
Finally, we will set the bounce domain for the DKIM record, which is done a bit differently. First, in Incomaker, in the “Campaigns” tab, expand the “Settings” menu in the left-hand panel and select “DNS settings.” In the “domain” field, enter your domain name with “news.” in front of it — in our case news.signum.cz — and click the “Generate DNS records” button.
You set this record in the same way as you set the DKIM record; it is described in the section titled “DKIM” in the guide.