The vast majority of e-commerce stores can benefit from an abandoned cart reminder. However, it is often advantageous to engage customers even earlier, when they are still browsing the website and have not yet added anything to their cart. At this stage, we cannot always identify the customer, and we can only estimate their intentions. Even so, our experience shows that this type of campaign achieves very high email open rates. It is also a less commonly used automation, which means it can reach customers before your competitors do.
Start by selecting the Regular Email campaign from the automated campaigns section:

Name the campaign as needed and configure the repetition schedule according to your requirements.
For Abandoned Purchase campaigns, the behavior differs from Abandoned Cart campaigns, where each cart addition generates a separate notification.
With Abandoned Purchase campaigns, events are evaluated in bulk at the times you specify. This prevents customers from receiving repeated notifications in a chaotic or excessive manner. A proven approach is to run the campaign approximately once per hour during daytime hours.

The most important part is configuring who you want to target:

Use Visited URL – Duration if you want to trigger the campaign based on the amount of time spent in a specific category, or Visited URL – Frequency if it should be based on the number of views (visits). Of course, both approaches can also be combined.

Here is an example of a possible configuration:

We recommend using the main domain of your e-commerce store in the URL field and then excluding service pages (so that only product pages remain).
While not required, it is strongly recommended to also exclude users who have added items to their cart or have already placed an order. These actions have a higher priority and are handled by their own dedicated events:

Don’t forget to also exclude the campaign itself to prevent it from being triggered repeatedly.
Click Next to proceed to the template, where you can configure what will be sent to the customer. The most common approach is to use an automated widget from the E-commerce section (2 products or 3 products, depending on the structure of your template).

Select the appropriate engine that determines which products will be offered to the customer. For example, you can choose Last Viewed, but depending on your strategy, Smart Recommendations, Last Purchase, or other options may also perform well.

Don’t forget to save the campaign by clicking Save and Exit (at the bottom).
Once a customer completes an order, you can automatically send them an email after a certain period, inviting them to share their shopping experience. This simple process allows you to easily gather feedback and boost your brand visibility on social media.
How to Set It Up
To set up the campaign, click the “Campaigns” button, then click the “Reviews and Satisfaction” button, which you’ll find in the top right corner of the screen. Here, you’ll choose whether you want to create a mention on Facebook or LinkedIn.

For example, if you choose the Facebook mention option, a new window will open where you’ll name your campaign and set the time interval after which the customer should receive the email. You can also use advanced filters to ensure that only specific customer segments receive the email.

After clicking “Next,” you’ll be redirected to the email templates page, where you’ll create your email in the usual way, according to your preferences. A key element in the template is the “Mention on FB” button – when the customer clicks it, their Facebook account will open with a pre-filled post, allowing them to easily share their review.

If you want to send customers an email inviting them to review on LinkedIn, follow the same process. However, in the “Campaigns” section, instead of the “Mention on Facebook” button, select the “Mention on LinkedIn” option.
© 2026 Incomaker Support
“I have been told that if I put a special character in the subject line, like the registered trademark symbol (®) or an emoji, it’s true that the email will go to spam. Is this correct?”
That is not true, but it’s a common misconception that touches on a more complex topic.
First, it’s essential to distinguish between an email being marked as spam and being filtered into a promotional or bulk folder (like Gmail’s ‘Promotions’ tab). Users sometimes confuse the two, but the difference is significant.
- Spam: This means the email has been identified as unsolicited mail. This is always undesirable.
- Promotional/Bulk Mail: This is a legitimate email delivered to a user’s inbox, but an email client has algorithmically identified it as commercial or mass-sent, rather than personal correspondence.
A special character in the subject line, on its own, should not cause your email to be marked as spam.
It also shouldn’t be the sole reason for being filtered as promotional mail. However, email services use many different and often non-public criteria to make this distinction. Their algorithms try to identify patterns that separate personal communication from marketing emails.
Because of this, using elements like emojis can indeed increase the ‘score’ that flags an email as promotional. But it is always a combination of many factors, and a single character will not decide the outcome on its own.
Celebrate memorable moments with your customers and delight them with a special offer for their first purchase anniversary.
On the campaign card, click “First Purchase Anniversary,” which you’ll find under the “Automated Campaigns” section.

Campaign Setup
In the next settings, you’ll choose the campaign name and when the campaign should be sent. In the “Reach” section at the bottom, you can check the number of contacts the campaign will be sent to. The campaign will automatically be sent to those who made a purchase exactly one year ago and haven’t purchased anything else since then.

Template Customization
In the next step, customize the template as you normally would to fit your requirements. Remember to motivate customers with a special promotion or a discount coupon for products they might be interested in – this will increase the campaign’s success.
To do this, use the automatic product blocks found in the “E-commerce” category. Drag the automatic product block into the template and choose the product display criteria based on which products you want to show in the campaign. Confirm your selection, and you can then launch the campaign.


Need to embed a form on your own website to collect customer data? Use our “Embed Custom Content on Pages” feature to easily insert it into your site without needing to edit your existing pages.
You’ll find the form settings on the “Campaigns” tab under “Embed Custom Content on Pages” in the “Widgets” section.
Form Configuration
Name your campaign whatever you like. If you want the form to display only during a specific time period, enter those dates into the corresponding fields.
Template Creation
In the next step, you’ll move on to creating your templates. You can either choose one of the system or your own templates, or you can create a completely new template from scratch to fit your vision.


Embedding the Form
After you’ve customized your template, proceed to the final step. Insert the form code into the HTML of your website where you want the form to appear, and your newly created form will be displayed there.
Advanced Settings
In the “Advanced” section at the bottom, you can optionally configure which mailing list the contact should be added to after filling out the form.
SMS Length
The total length of a standard SMS message should be within 160 characters if you do not use diacritical marks (e.g., accents). If you use characters with diacritics (like á, č, ř), you must be aware that the limit for a single SMS drops to 74 characters. If you send a longer message, it will be split into multiple parts (which increases costs), or it should be sent without diacritics.
Links in SMS
We use a link shortener for URLs, and each shortened link will use 21 characters of your message. Always enter the full link, including the protocol (e.g., https://www.incomaker.com, not just www.incomaker.com), otherwise, click-throughs cannot be tracked. The link shortener can be disabled in your account’s general settings; however, please note that if you disable it, you will not be able to track the performance (click-throughs) of your SMS campaigns.
Commercial Messages
For SMS messages, we recommend adding the prefix “OS” (a Czech abbreviation for Obchodní sdělení, or Commercial Message) before the main text. This identifies the message as commercial communication and helps prevent the SMS gateway from potentially flagging your messages as spam.
Unsubscribing from SMS
Just as with email campaigns, every customer must have the option to unsubscribe from SMS messages. The easiest way is to create a landing page with an unsubscribe form. After a contact confirms their unsubscription, they can be added to a special suppression list (e.g., named “Do Not Send SMS”), which you then exclude when selecting the audience for future SMS campaigns. You can therefore include a link to this unsubscribe landing page at the end of every SMS message you send.
© 2026 Incomaker Support
Sending emails (as well as SMS and any other electronic communication) is only possible in accordance with the GDPR. Under Article 6, this provides two legal bases: either the customer’s explicit and demonstrable consent (point (a)) or so-called legitimate interest (point (f)).
Legitimate interest, therefore, allows us to communicate with customers in certain cases even without their explicit consent. The specifics of what this means are regulated by:
a) In the Czech Republic: Act No. 480/2004 Coll., on Certain Information Society Services, specifically Section 7. Such emails (and similar communications) must be labeled as “Obchodní sdělení” (Commercial Communication), the sender’s company must be clearly identified, they can only be sent to customers (existing or potential), and most importantly, there must be a simple and free-of-charge way to unsubscribe.
b) In Slovakia: Act No. 452/2012 Coll., on Electronic Communications, specifically Section 116, where the rules are largely the same as in the Czech Republic.
Therefore, in your email communications, you must include a statement that it is a commercial communication (for Czech customers), your company name, and an unsubscribe option.
The dashboard is used to display important information and metrics in one clear interface that allows users to monitor and manage various aspects of their Incomaker campaigns.

In the “Recent Campaigns” table, you’ll find the three most recent one-off campaigns you’ve sent. Below the three most recent one-off campaigns, the “All Campaigns” text is active. Clicking on the text will take you to the “Reports” tab where you will find a summary of all your campaigns. Either the one-off or the automatic campaigns.

In the “Automations (last 7 days)” table you will find the last three automated campaigns that have been activated. Below the last three one-time campaigns, the text “All campaigns” is active. Clicking on the text will take you to the “Reports” tab where you will find an overview of all your campaigns. Either the one-off campaigns or the automated campaigns.

In the “New Customers” table, you will find the number of new customers registered from Pop-ups, registrations from forms, new registrations on the e-shop or contacts imported from offline databases. The table of contents is the information of the increase of contacts for 1 day, 7 days and 30 days. Below the table is the active text “All customers“. Click on the text and you will be redirected to the “Reports” tab, where you will find an overview and graphs of the increase or the number of unsubscribed customers.

In the “Activity (last 30 days)” table you will find a general overview of your activity in Incomaker. In particular, how many active contacts you have in your database. This indicator informs you about all contacts to whom you can create marketing campaigns and have not unsubscribed yourself. The next chart shows a cumulative overview of your communications. This refers to all communication via campaigns in email or SMS marketing.
In the next part of the chart you can see, for example, how successful your campaigns are and how many people from all communications have responded in the last 30 days. The last chart shows how many people have unsubscribed from all marketing activities in the last 30 days. The table is for informational purposes only and serves as a simple overall overview. In case you want more detailed statistics, you can find them in the “Reports” tab.

In the “Conversions” table, after running individual campaigns, you will see how many people responded to the campaign and their activity led to an order. In the report you can see how many orders came in collaboration with this campaign. The overview is compiled by day. Below the table is the active text “All conversions“. Clicking on the text will take you to the “Reports” tab to the “Conversions” category where you will find a summary of each order, including the order amount and who created the order.

© 2026 Incomaker Support
Would you like to make non-automated emailing even more efficient? We have a solution for you in the form of the Smart Audience scenario. You choose the products and we choose who we send the email to, so that it brings you the most conversions.
Campaign creation
You start by selecting Smart Audiences from the Campaigns tab in the left menu.

This will open a window where you can either choose from our system templates (the ones that are suitable for this type of campaign are offered in the first few places) or, if you want to make a template yourself, select the New Template option.
Inserting products into a campaign
If you are creating a new template or have chosen a template with only blocks for automated product addition, you need to insert at least one manually selected product.
In the editor on the left, switch the category of blocks offered to the Products category, select the block and drag it into the template. The Product Tray will open and you choose which product(s) you want to insert into the template.

If you have selected a template with a non-atomized product block, see how to edit this block.
Once you have the template ready to your liking (more tips on working with the editor), the email header filled out and everything checked in the test email, click Next.
Selecting recipients
In the Reach step, recipients who were interested in the products in the template will be selected. You can restrict this selection by using filters (e.g. send only to customers who have not placed an order in the last week) or by using a mailing list. You cannot expand this selection.
Sending a campaign
Once you have your recipients selected, all that’s left to do is click the Send button to complete the campaign or schedule it to be sent at a later date.

Some UTM tags are added to each link automatically in Incomaker.
Specifically, the following tags will be added to any email, SMS or social media campaign send out:
- utm_source (Incomaker)
- utm_medium (by campaign type)
- utm_campaign (campaign name)
Editing UTM tags
If you want to set different UTM tags, click on the UTM tags button in the specific campaign and overwrite the pre-populated fields you want to change and save.
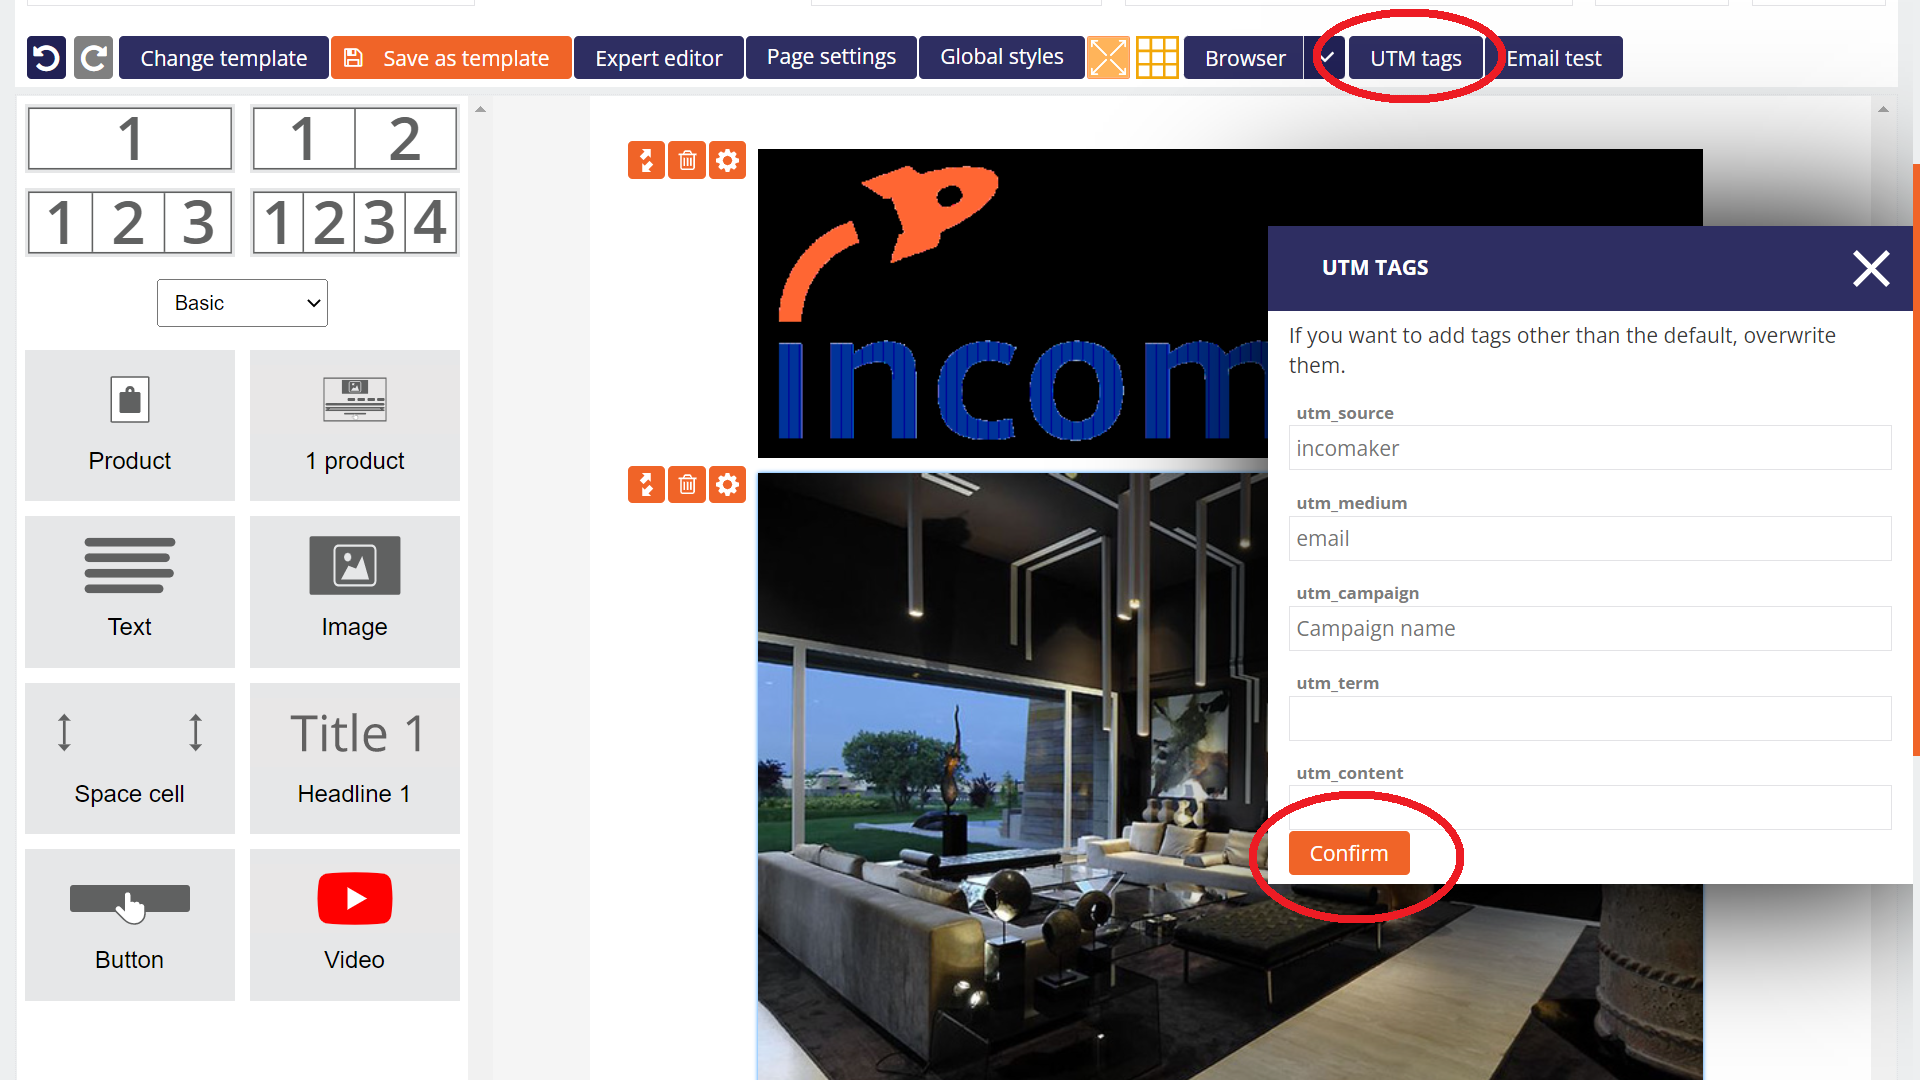
If you are making changes to an automated campaign, you need to save the campaign by clicking Finish.
Changes need to be made to all campaigns in which you want to use tags other than the default tags.