Fonts other than the standard web-safe fonts, such as: Arial, Times New Roman, Verdana, Georgia, Tahoma, Lucida, Lucida Grande, Trebuchet MS, and Courier, will not display in the vast majority of email clients.
If you need to use a special “extra” font, the only reliable method is to create an image and add the text with your desired font onto that image using a program like Photoshop.
Author: bartos@incomaker.com
00. Block (Widget)
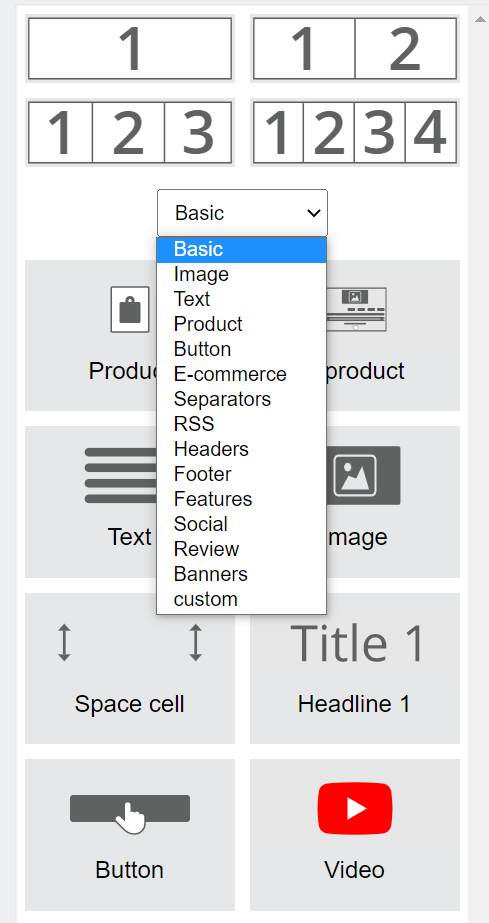
A block (widget) is a content element in the editor used to create an email message. Blocks are divided into row blocks and column blocks. All blocks (widgets) are located on the left side of the editor. See the image below.

00.01 Row blocks (widgets)
Row blocks (widgets) are divided into empty blocks and content blocks.
00.01.1 Empty Row Blocks (Widgets)
Empty row blocks (widgets) contain only empty columns (1 to 4), into which content such as images, text, buttons, and other elements can be inserted. See the image below.

00.01.2 Content Row Blocks (Widgets)
Content row blocks (widgets), as the name suggests, contain pre-configured columns with content. These include almost all blocks (widgets) except those in the following categories:
- Basic
- Text
- Buttons
01. Background Behind the Email Body
The background behind the email body is the area in which the email body is located. See the blue area in the image below.

02. Email Body
The email body is the area that contains the content of the message. See the area outlined in red in the image below.

03. Row
A row is an area within the email body that contains content columns. See the areas outlined in red in the image below.
Rows can be freely moved, and the background color is configured at the row level.

04. Column
A column is an area within a row that contains individual content elements, such as images, text, buttons, and more. See the area outlined in green in the image below.
Columns are static and cannot be moved. Inner spacing (padding) is configured at the column level.

05. Column Content
Column content consists of images, buttons, text, and other elements. These can be found in the following categories:
- Basic
- Text
-
Buttons

Author: bartos@incomaker.com
00. Setting the Background Color
The background color can be configured in three places within the editor, in addition to the Global Styles and Page Settings options. We will cover Global Styles and Page Settings later.
- On the row level.
- On the column level.
- On the text div (text block) level.
In most cases, we set the background color at the row level.
00.00 Setting the background color on a row

Use row background color settings as the primary method for changing the background color.
00.01 Setting the Background Color on a Column

Use column background color settings only if you want to achieve differently colored columns within a single row. See the image below.
00.02 Setting the Background Color on a Text Div

Background color setting on a text block – this is provided for informational purposes only. In practice, it should not be used.
01. Text Settings
Text can be styled in two places within the editor, in addition to Global Styles. We will cover Global Styles later.
-
Basic menu
- Menu styles
01.00 Basic Menu

Styling text via the “Basic menu” is primarily used for formatting parts of a paragraph. It allows you to adjust text color, font size, weight/boldness, and alignment. However, for most text formatting, you should use the “Styles menu” (see the section below).
01.01 Styles Menu

Styling via the “Styles menu” is the primary method for setting the appearance of text. If you have a heading and body text underneath it, insert two text blocks into the desired column, as shown in the GIF below.

02. Setting inner spacing (padding)
Padding (inner spacing) can be set in four places:
- on the column,
- on the row,
- on the text div,
-
or in the page settings.
02.01 Setting inner spacing (padding) on a column

Setting inner spacing (padding) on a column is our primary method for styling email templates. Other methods are only used when creating pop-up windows or landing pages. Even in those cases, we still prefer setting padding at the column level.
02.02 Setting inner spacing (padding) on a row

Padding on a row is used only when creating pop-up windows and landing pages.
02.03 Setting Inner Spacing (Padding) On a Text Div

Padding on a text div is used only when creating pop-up windows and landing pages.
02.04 Setting Inner Spacing (padding) in Page Settings

Padding in Page Settings is used only when creating pop-up windows and landing pages.
The following guide is based on our own experience and knowledge.If we are mistaken about anything, please do not hesitate to write to us at bartos@incomaker.com; we are always happy to learn something new.
Design Summary
- No Overlapping Elements: Design elements cannot overlap, as email clients do not support this functionality. Overlapping effects can only be achieved by creating them as a single, flat image that is then inserted into the email.
- Web-Safe Fonts: The fonts that will display correctly almost everywhere, and which should form the foundation of your design, are: Arial, Verdana, Helvetica, Georgia, Tahoma, Lucida, Trebuchet, Times New Roman, Courier, Courier New, and Geneva. Any other font will fail to display in 99% of email clients.
- Element Alignment: For maximum compatibility and predictable rendering, the best choice is a simple, often centered, alignment that works reliably on both desktop and mobile. If you are designing a more complex multi-column layout, you must account for how the elements will reflow and realign on mobile devices (typically stacking vertically).
- Image and GIF Dimensions: Images and GIFs should dimensionally match the block they will be placed in (e.g., do not insert a 150px wide image into a 200px wide block. It would either fail to fill the block, or if stretched, it would become distorted and lose quality). Supported formats: .jpeg, .gif, .png.
- Image File Size: Although there is no direct penalty for image file size, it is crucial to keep it as low as possible. Large images (in MB) can cause problems: they significantly slow down email loading, consume the recipient’s mobile data, and can even cause some email clients (like Gmail for messages over 102 KB) to clip the email or trigger spam filters. Always strive to optimize images for the web before uploading.
- Background Images: Design background images without relying on precise positioning of elements over them. Their support is inconsistent across email clients, and many will not display them at all. Always specify a solid fallback color.
- Font Sizes: A good standard is 14px for body text on desktop and 16px on mobile. Heading sizes are a matter of design choice.
- Email Body Width: The default email body width in Incomaker is set to 640px, and our product blocks are designed for this width. Using a narrower email body may result in product elements not aligning correctly on the same row.
- Video in Emails: Video can only be included as a linked image or GIF. Incomaker’s template editor includes a tool to automatically generate a thumbnail from a YouTube video, which links directly to it.
Design Requirements
- Create your design in an application like Affinity Designer, Photoshop, or another vector editor, or a web-based equivalent like Canva.
- The design should be at a 1:1 scale, with all dimensions in pixels.
- Export and send all graphical assets (images, icons, etc.) separately from the main design file, in .png format with a transparent background.
- If you wish to import an existing email template, please send it (as an attachment, not a forwarded email) to bartos@incomaker.com or provide us with access to the editor where the template is located.
Design Explained
1. Fonts
As stated above, fonts other than the standard web-safe list (Arial, Verdana, etc.) will not display in the vast majority of email clients. If you need to use a custom font, the only reliable method is to create an image and place the text with the desired font onto that image in a program like Photoshop.
2. “Mobile-First” Design
The more complex a template is, the greater the chance it will render incorrectly or inconsistently across different clients. It is universally recommended to design templates with a “mobile-first” approach, prioritizing simplicity and a clear hierarchy.
3. Multiple Elements on a Single Line
If you place multiple elements on one line (e.g., text-logo-text), it is best practice to have them occupy equal width within the row and be centered consistently with the rest of the template.
4. Dimensions
Email Width: The email body width is set to 640px in Incomaker. This is crucial for our product blocks to render correctly. A narrower design may break the layout of these blocks.
Image Sizes: Image sizes do not have to be exactly 1:1 with their container, as they can be adjusted with HTML/CSS. However, if an image or element appears at a different size or alignment in one client versus another, it requires testing and fine-tuning. This can be caused by various factors, and layouts can “break” from time to time due to updates in email clients. Ideally, all images in the same row should have the same width or height, or both.
Font Sizes: Font sizes and line heights are up to your discretion and testing. The general recommendations are:
- 14px for standard body text on desktop.
- 16px for standard body text on mobile.
- Heading sizes are purely a design decision.
- Be aware that font rendering can vary slightly across different devices and clients.
Background Images: Background images do not render in some email clients, and it is very difficult to ensure precise placement of foreground elements on top of them. A safe approach is to use a background image for the main email body with a texture or pattern that does not require exact positioning. Always include a solid fallback background color for clients that do not support background images.
Padding: Padding is a design choice. However, the rule of simplicity applies here as well. If you center most of your content, you often don’t have to worry about complex left and right padding adjustments for different clients.
GIF Dimensions: The dimensions of a GIF should roughly correspond to the width of the container it will be placed in.
Video: Video is added to emails as a link. This is typically done by using a static image or a short, looping GIF as a preview that links to the full video on YouTube, your e-shop, or your website. The video file itself cannot be embedded. Incomaker provides a tool to automatically create these linked thumbnails from YouTube videos.
Some UTM tags are added to each link automatically in Incomaker.
Specifically, the following tags will be added to any email, SMS or social media campaign send out:
- utm_source (Incomaker)
- utm_medium (by campaign type)
- utm_campaign (campaign name)
Editing UTM tags
If you want to set different UTM tags, click on the UTM tags button in the specific campaign and overwrite the pre-populated fields you want to change and save.
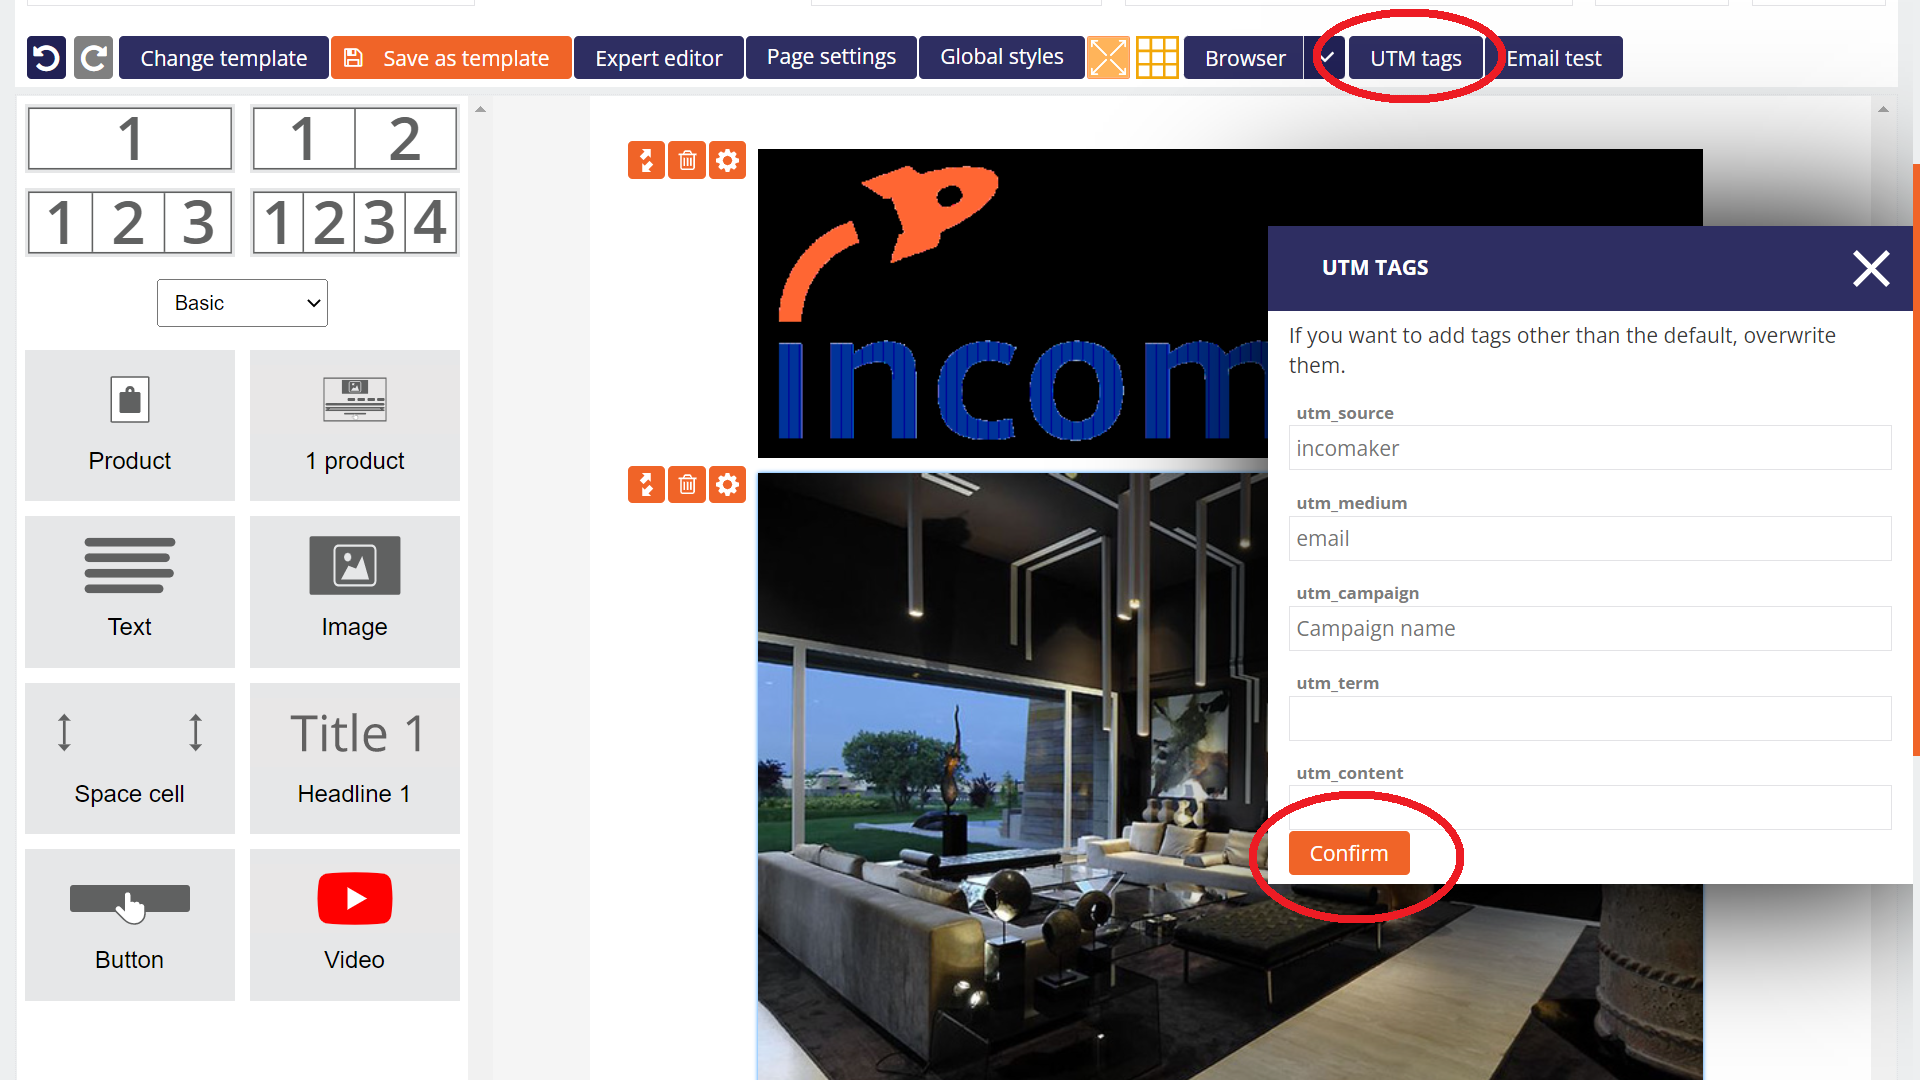
If you are making changes to an automated campaign, you need to save the campaign by clicking Finish.
Changes need to be made to all campaigns in which you want to use tags other than the default tags.
Structure of the e-mail
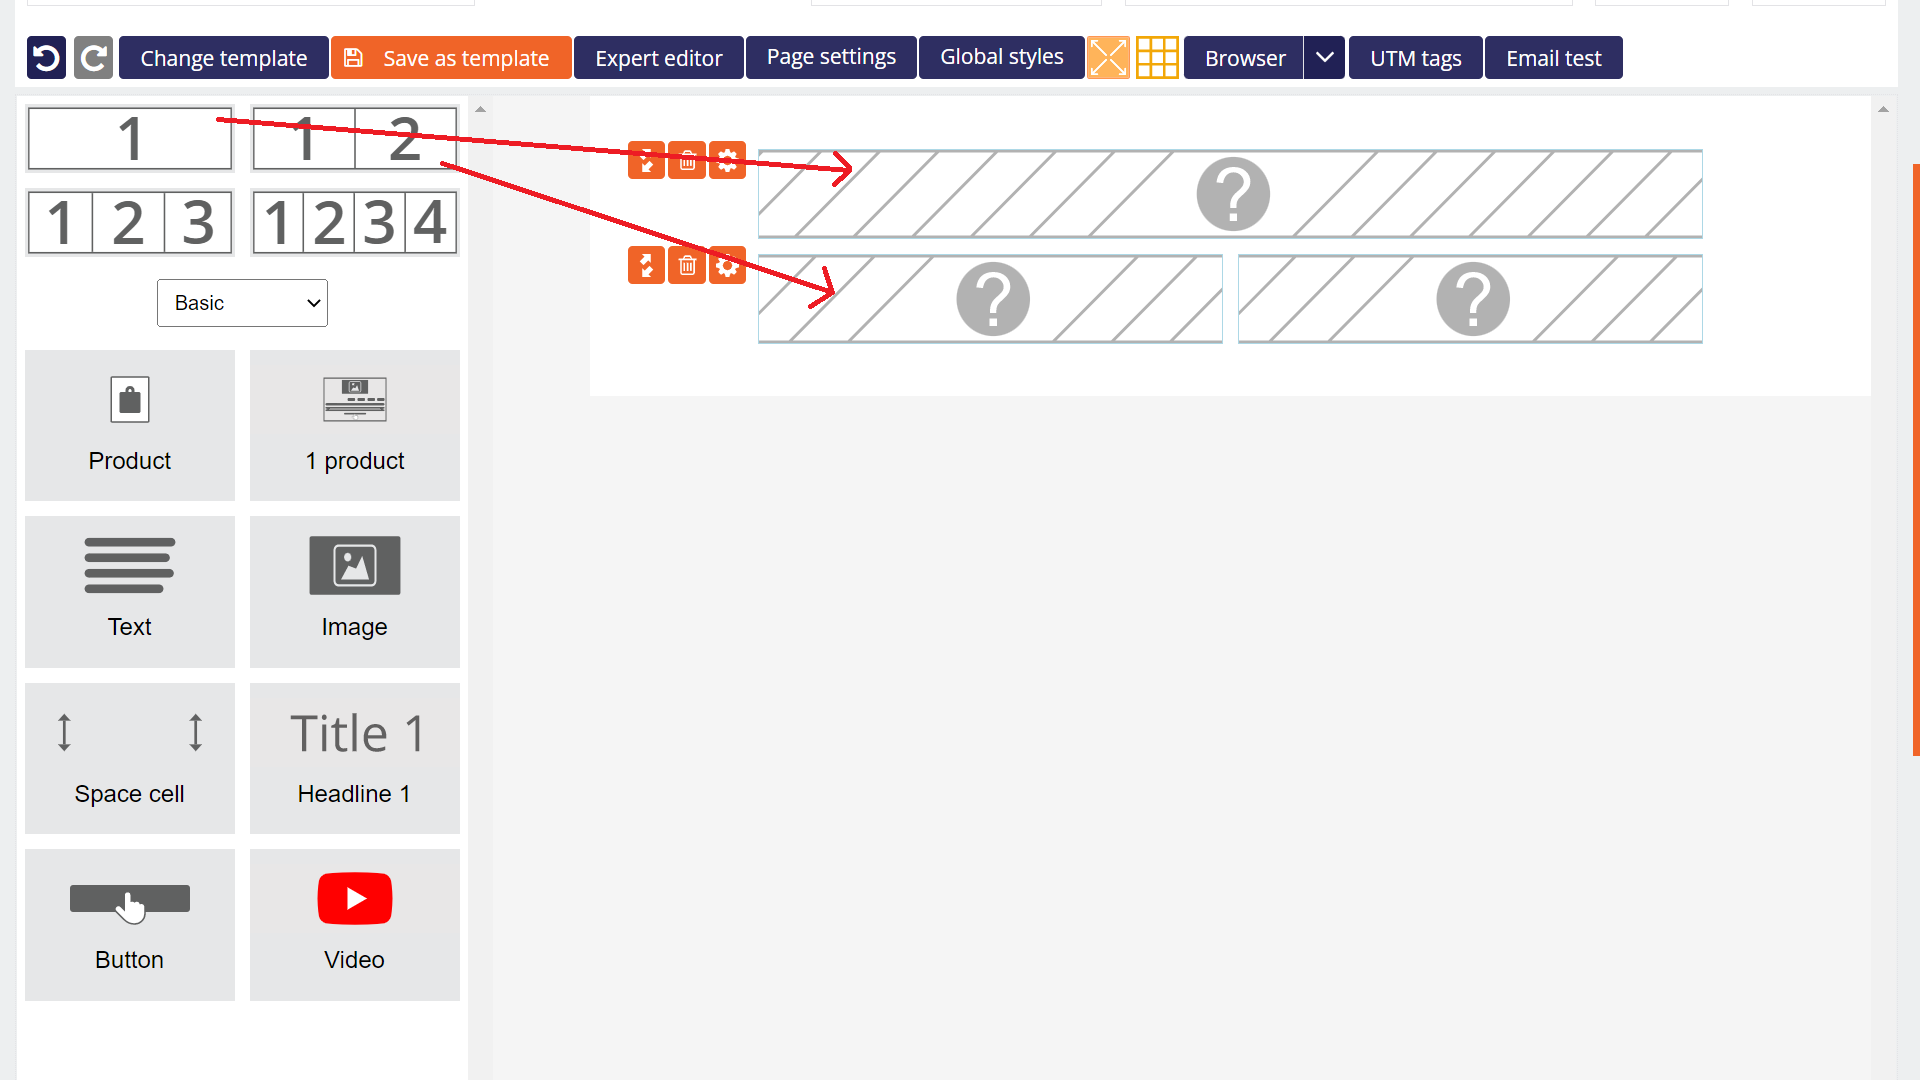
First, prepare the structure of the email by dragging the blocks with the number of columns into the editor. For example, you want the email to start with a logo and have an image below it and text with a button next to it. So drag a block with one column first and two columns below it into the editor.
Insert the desired components into the individual blocks.
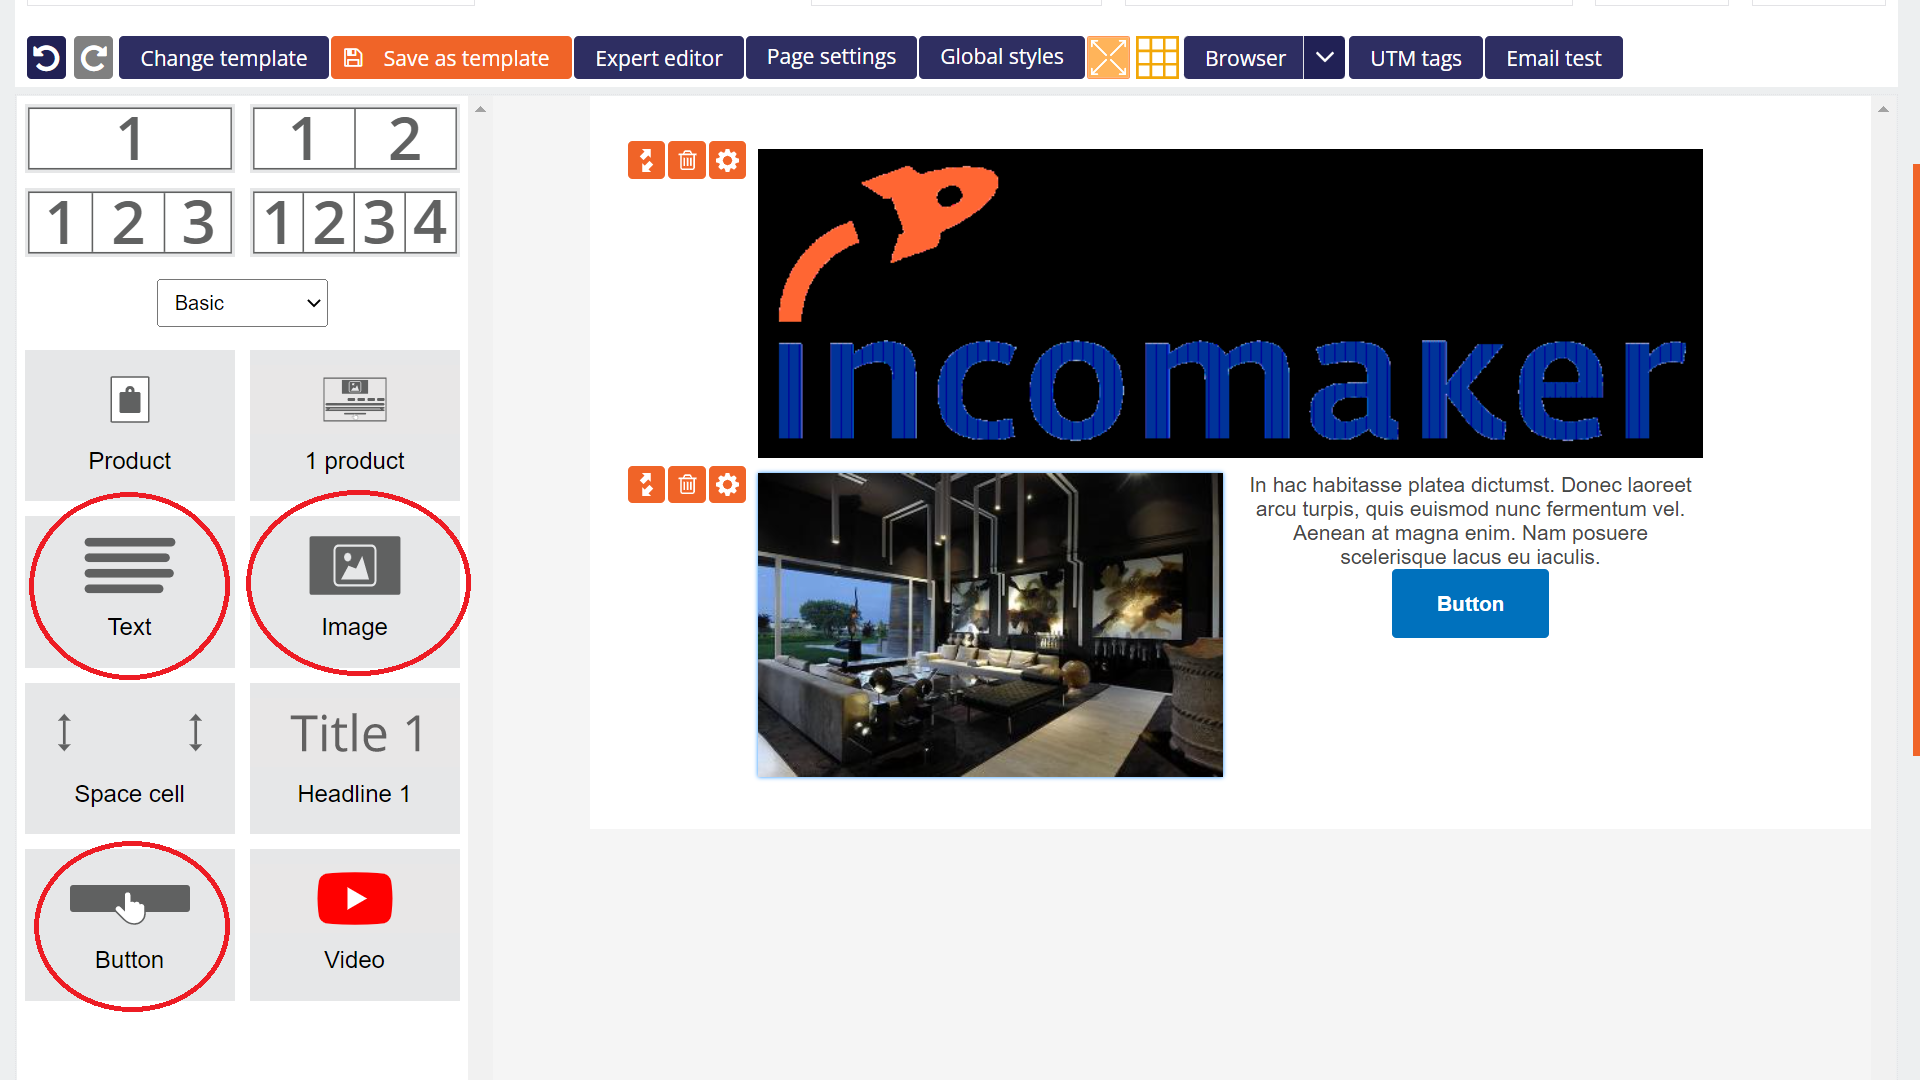
For clarity, the components are categorized. In the basic category you will find basic components such as text, button and image. The logo can be found in the header category and in the image category we have prepared whole lines for you – for example, two images side by side and two buttons below them.
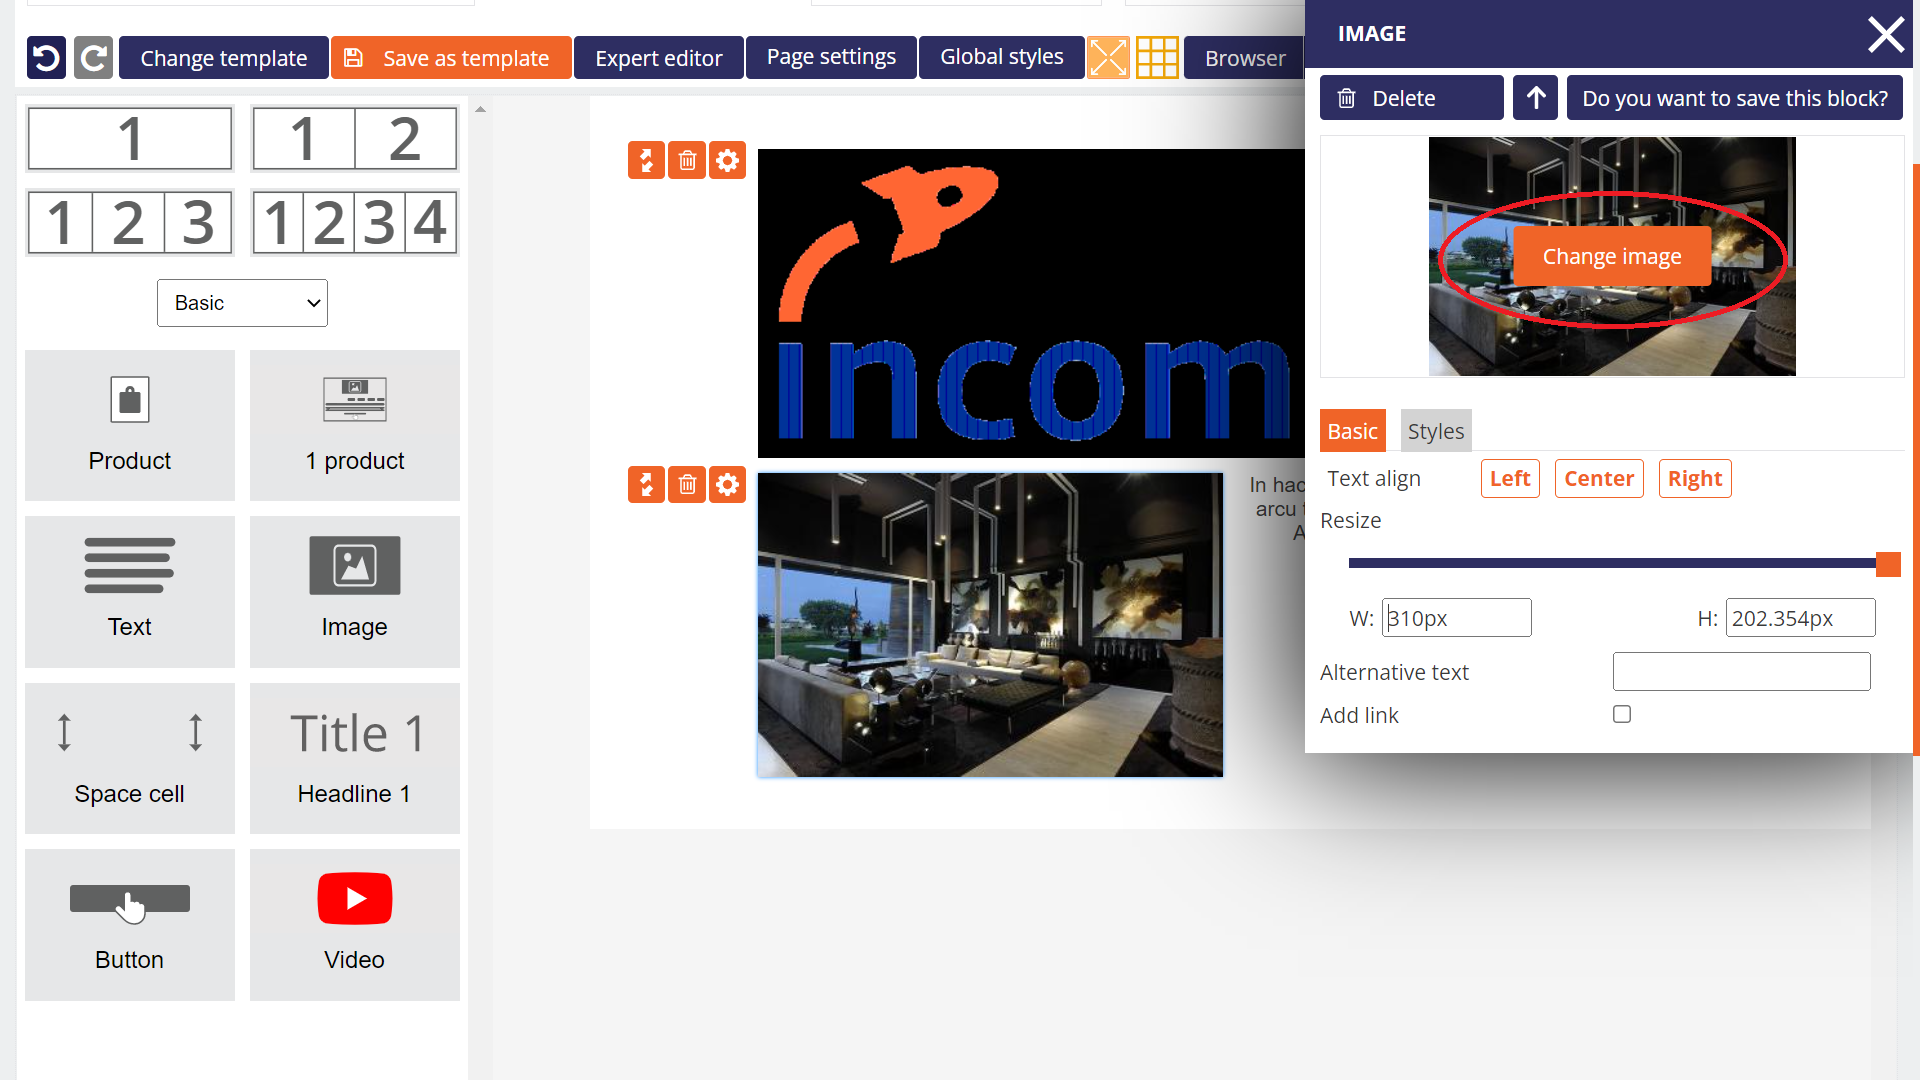
Change the image
If you want to replace an image that is already embedded in the body of the email, click on the image to open the image settings dialog. Click the Change Image button and Incomaker will show you a menu of images you have saved or upload new images via the Upload Image button.
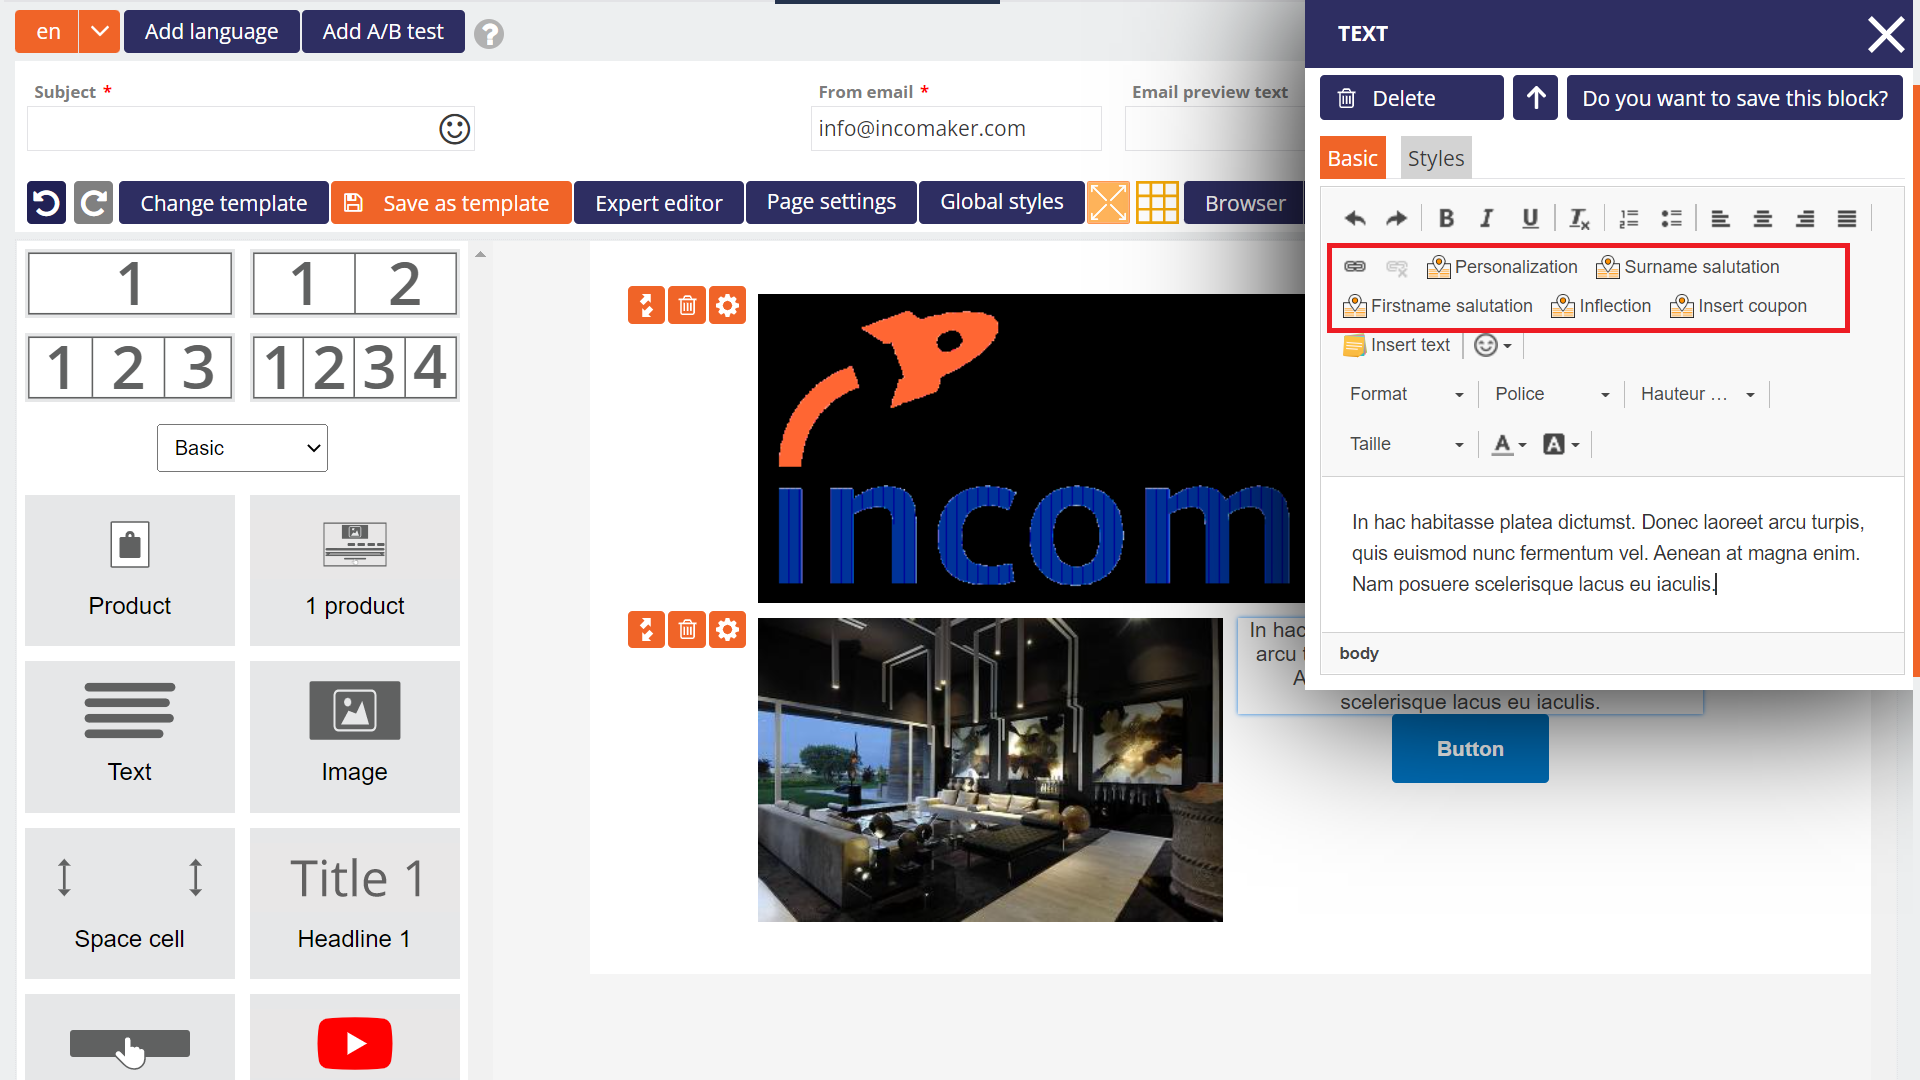
Insert personalization
If you need to insert elements that should be personalized in the email depending on who the email is going to, such as the salutation, click on the Personalization icon in the menu and select which fields you are interested in. For example, salutation, company name, etc. Incomaker then adds the content to each unique customer individually when sending, so the emails look as if you wrote them by hand.
More detailed instructions can be found in the Substitute Texts article.
Inserting dynamic content
Incomaker can easily handle very advanced personalization of mail content. This functionality is called dynamic content and is inserted in the editor via special elements that ensure the addition of specific content to individual mails. In the component categories, you select Ecommerceand choose from ready-made automated blocks. You drag and drop this into the prepared one-column structure in the mail. A dialog will open with the dynamic content settings and you select the number of items (products) to be added. If you want to send 4 products, you insert one block and write 4 in the number of items field. Next, you select whether you want to send fully personalized content (choose the Smart Product Recommendation option) or, for example, News or Products in Action. Finally, select the currency and save the settings for the block with theConfirm button.
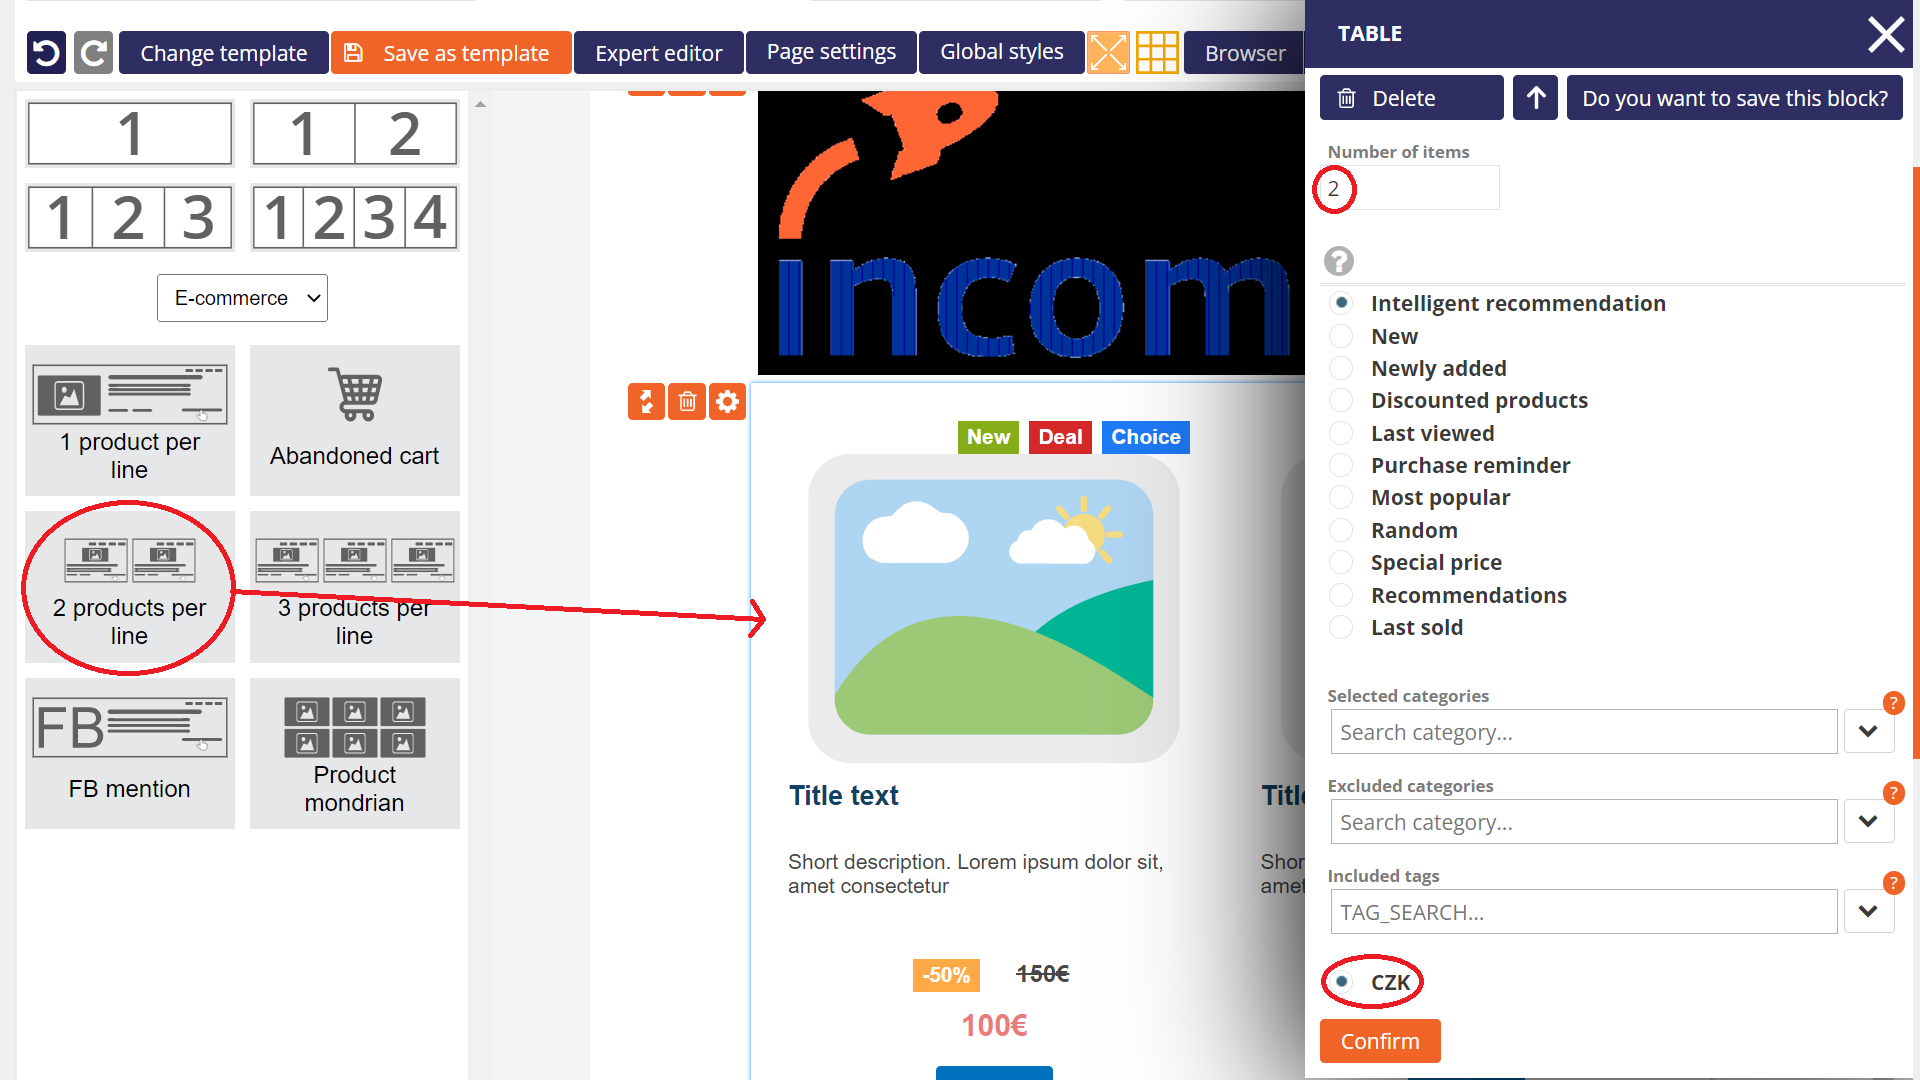
When sending the email, the appropriate content (images, product names, etc.) will be added. According to your preferences, you can change, for example, the font colour, buttons, font size, etc.
Editing dynamic content
If you need to change what Incomaker should add to the dynamic content, click anywhere in the element and the dynamic content editor opens immediately
In the Dynamic Content dialog you can set how many items (products) should be displayed in the mail, or you can modify the product selection criteria. Nothing prevents you from having more Dynamic Content elements in the email and your email can then look like it first contains a selection of news (News) followed by an article from your blog (Smart Article Recommendation) on the topic and finally an offer of several products relevant to the customer (Smart Product Recommendation).
Incomaker allows you to customize your email campaigns with placeholders easily. A placeholder can help you better connect with your audience by sending unique, customized emails tailored to the recipient.
Adding a Placeholder
To add a placeholder, drag and drop a text box into your email and click the placeholder button.
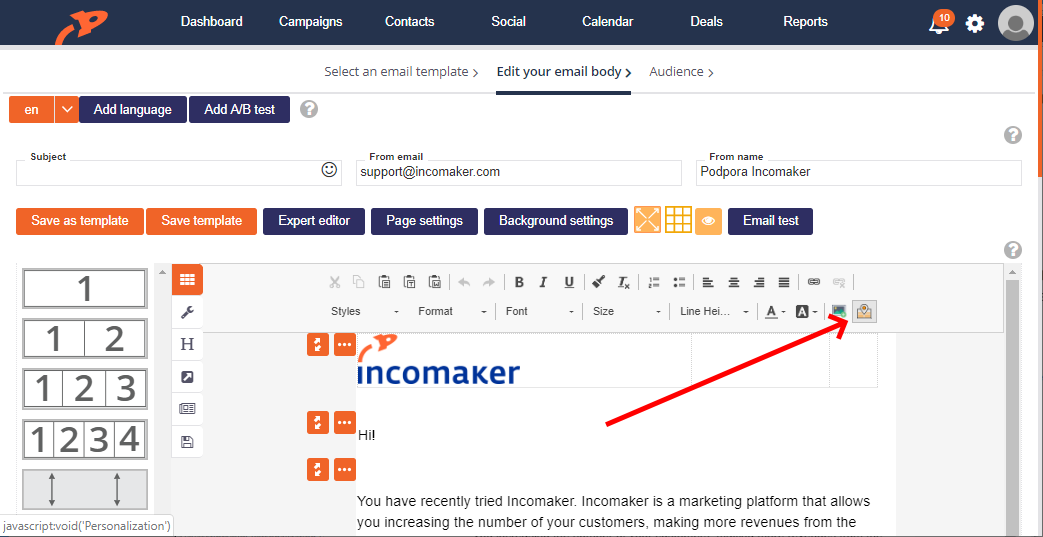
After you select the placeholders button, a menu of available placeholders will appear. This menu contains placeholders related to the recipient’s information, your personal information, and your company’s information.
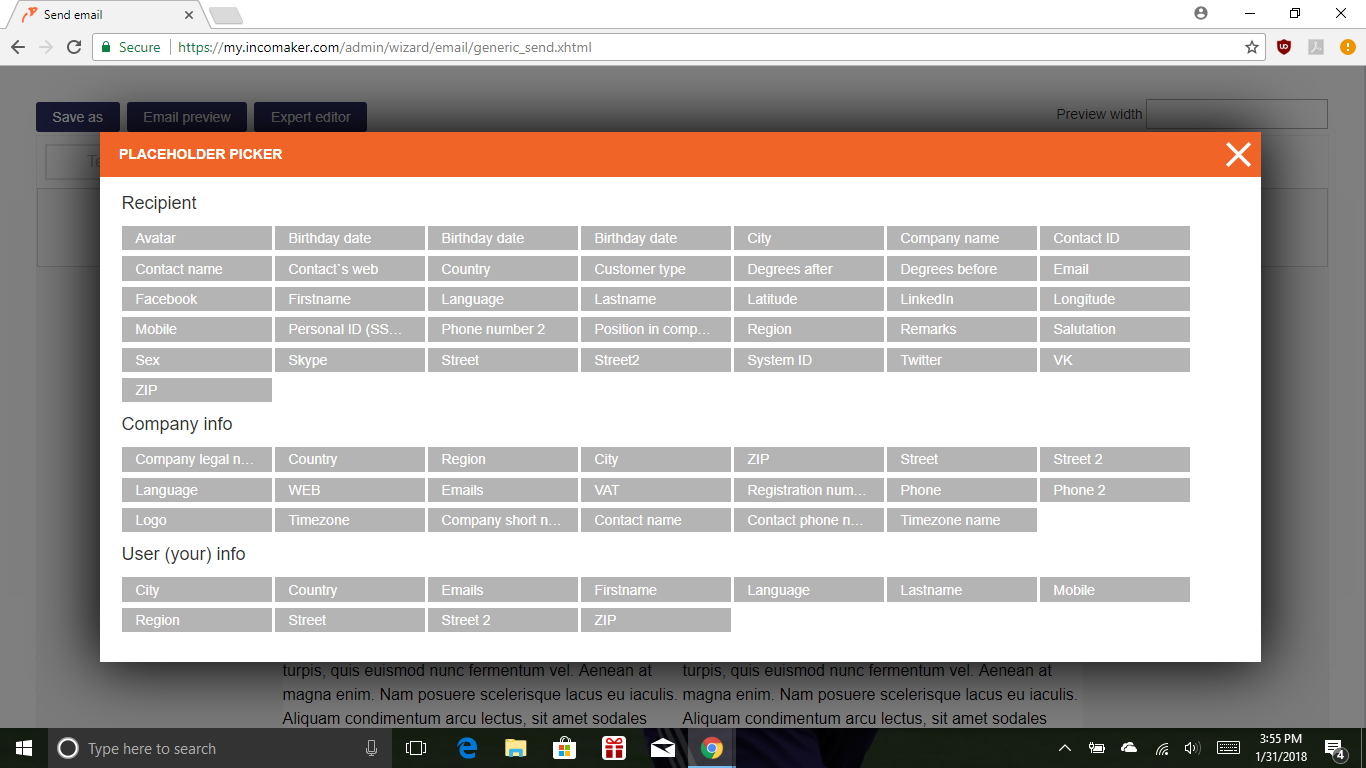
Once you click on a placeholder, it is added to your email. For example, when you select Salutation, the following placeholder text will appear:
__salutation__
If you know your desired placeholder, you can bypass searching for it in the placeholder menu. Type the exact characters of the placeholder you would like to add.
Your email will be received only to the recipients that have a Salutation field filled in their contact information. It means that the contacts with empty Salutation field could be omitted (Incomaker will notify you).
This potential issue can be easily solved by using a separator and including another placeholder. For example:
__salutation||name__,
If your user doesn’t have a Salutation in their contact information, Incomaker will automatically look for their contact name. If this field is not empty, Incomaker will deliver the email to them with the contact name placeholder inserted.
Afraid some of your contacts may not have either field filled out? You can back yourself up and avoid unsent mail by adding a common message, like Hello, in quotations. For example:
__salutation||name||"Hello"__,
Incomaker will now send Hello to anyone that doesn’t have a Salutation or Name in their contact information. Remember to always add a comma to the end of a placeholder line.
Images are key to marketing campaigns
Almost all of your marketing campaigns will require images to be successful. At Incomaker, we understand that your business uses a myriad of images in marketing. That’s why we’ve created an Image Manager tool that makes it quick and easy to upload images all at once.Import images
To import images, hover your mouse over the cog and click Image Library.

Otevře se nové okno, kde po kliknutí na tlačítko Nahrát obrázek se otevřou složky v počítači, standardně vyberete obrázky a buď je přetáhnete do okna v Incomakeru nebo potvrdíte tlačítkem otevřít.
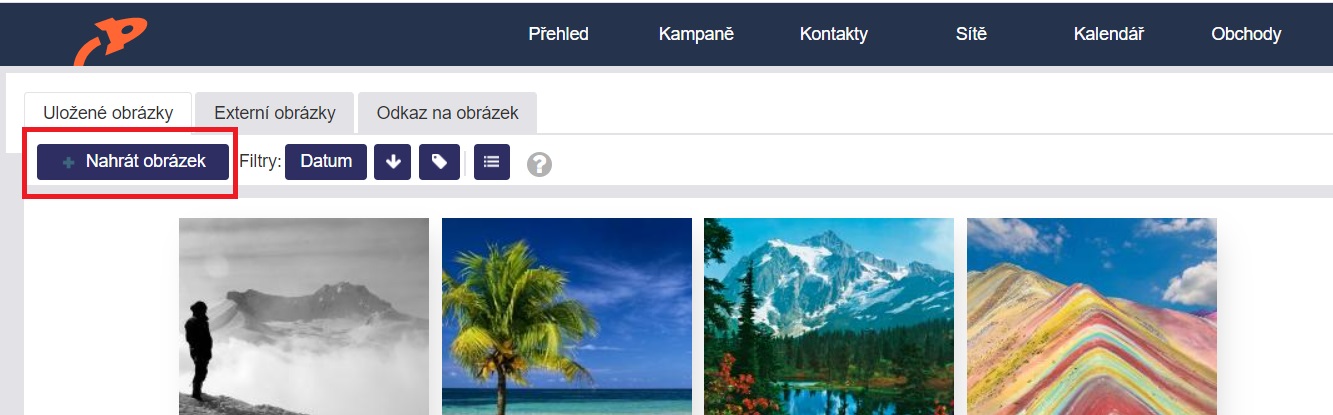
Image metadata
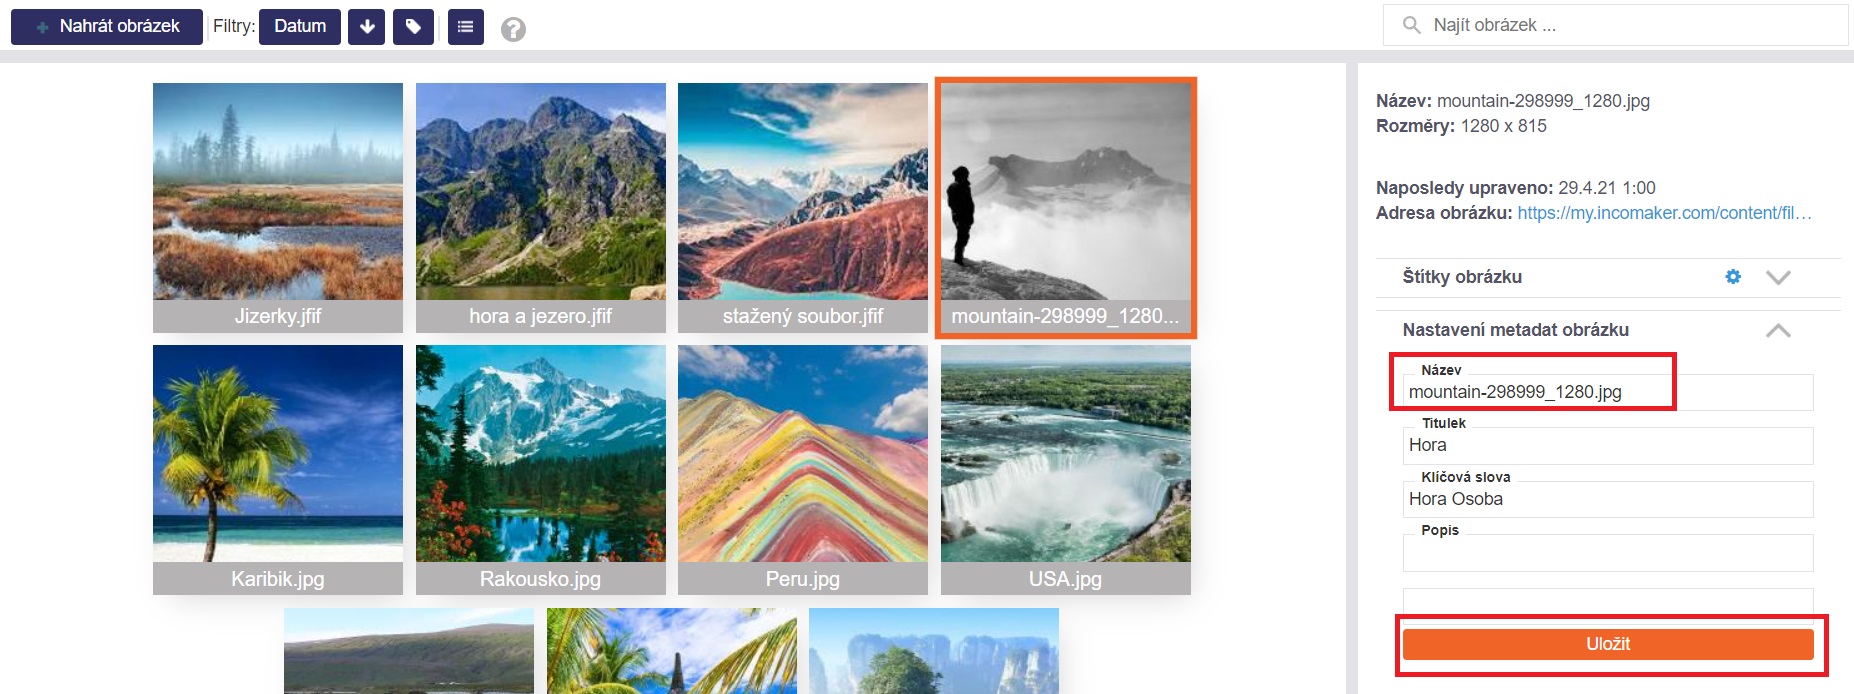
You can fill in the metadata for each image, at least the title of the image is recommended to make sense, because if your customers are not allowed to download images in their email, they will see the title. And for example, the title Man and Mountains looks more credible than the title mountain-298999_1280.jpg. You can also add keywords, for example, to make it easier to search for images.