Nastavte si vyskakovací okna neboli pop-upy pro sběr kontaktů do vaší e-mailové databáze.
Co je to teaser:Teaser je malý prvek, který návštěvníkovi jemně připomíná vaši nabídku – například textem „Získat slevu 10 % 🎁“
Pop-up okno a teaser (zobrazení teaseru a pop-upu)
Nastavíte 2 spouštěče jeden je pro samotný pop-up druhý pro teaser. Každý spouštěč daného bloku bude mít své podmínky kde a kdy a komu se zobrazí.

Publikum: Zde si můžete zvolit, zda se má pop-up zobrazovat známým nebo neznámým kontaktům.
Známý kontakt je pro nás ten, kdo splní alespoň jednu tuto podmínku:zaregistruje se do e-shopupřihlásí se k odběru přes pop-upklikne na nějaký odkaz v newsletteru
Pokud nastane jedna z těchto událostí, zákazníka si spárujeme s jeho prohlížečem a my k němu začneme sbírat data. V ostatním případě je pro nás kontakt neznámý.
Podmínky: Zde si můžete nastavit, zda se má pop-up nebo teaser zobrazit po určitém čase stráveném na stránce, po určitém procentu zhlédnutí stránky nebo při opuštění stránky. Pokud nastavíte více podmínek, zobrazí se při splnění všech vybraných podmínek zároveň.Cíl: zde si můžete nastavit, aby se zobrazovali jen na určitých stránkách, jen na některé kategorii nebo produktu.
Přidáte u jednoho spouštěče Vyskakovací okno (pop-up), s tím se rovnou přidá double opt-in.
U druhého spouštěče přidáte teaser
Přidáte sloučení a postupujete dle obrázků níže, aby se kroky sloučily:


Nastavení teaseru:
Povolit zavření teaseru: můžete nastavit, aby bylo možné teaser zavřít.Design: zde si nastavíte grafiku textu a pozici kde se teaser zobrazí.Náhled: vidíte zde vaše provedené úpravy.
Nastavení pop-upu:

Vytvoříte si pop-up, pomůžou vám s tím naše šablony ze kterých si můžete vybrat styl a a pak upravíte text
Validace e-mailových adres při vyplňování pop-upuChcete zamezit tomu, aby se vám lidé opakovaně přihlašovali přes pop-up, když už se jednou přihlásili? Nastavte si u potvrzovacího tlačítka validaci pop-upu. Klikněte na řádek s potvrzovacím tlačítkem a objeví se vám editační okénko, kde si zaškrtnete pole “Validace při odeslání”.
4. Double opt-inMůže se zdát, že potvrzení e-mailu v doručené poště uživatele jen zdržuje, ale v praxi vám toto nastavení zachrání od překlepů a nefunkčních adres, ochrání vás před spammery.
Tlačítko Přidat e-mail pro double opt-in vás přesměruje do sekce Šablony, ve kterých si ze systémových nebo vlastních vyberete vhodnou šablonu a tu upravíte. 
Důležitou součástí potvrzovacího mailu je tlačítko Ověření mailu.
Přidat kontakty do seznamu: zde si vyberete do jakého z vašich seznamů se kontakt přiřadí, jakmile potvrdí mail.
Poslední krok je přidání bloku odeslat mail a zde nastavit šablonu, která se zákazníkovi pošle po potvrzení double opt-inu.

Jakmile zákazník odběr potvrdí, systém mu automaticky odešle uvítací e-mail. V něm nového odběratele přivítáte v e-shopu a součástí je i slíbený slevový kupón.
Kampaň máte hotovou a můžete spustit.
Propojení publik se sítí Sklik
Chcete lépe zacílit své reklamní kampaně a zvýšit šanci na konverze? Právě k tomuto účelu jsme na Incomakeru zavedli možnost sdílení publik s Sklikem, která vám umožní oslovit specifické skupiny uživatelů.
Jak na to?
Klikněte na plus a vyberte spuštěč dle toho kdy má publikum odejít jednou nebo odcházet opakovaně. Nastavte datum a čas odeslání. ¸
¸
Naplánovaný start:
Opakovaný start:
Poté vyberte dosah přes upravit publikum:


Poté ve smartflow zvolte plus a zvolte Sklik publikum:
Klikněte na odkaz sklik.cz/settings – toto vás odkáže na přihlášení do Skliku, přihlaste se a zkopírujte si API klíč.


Skliku přejděte do nástrojů – Retargeting a vytvořte si seznam do kterého chcete, aby se kontakty posílaly.
Jako poslední krok v Incomakeru zadejte API klíč z Skliku, tím se účet propojí. Vyberte seznam, který jste vytvořili v Skliku.

Poté smartflow spuste a máte hotovo.
Proč si spustit pop-up pro získání nových kontaktů
Nastavení pop-up okna je jeden z nejrychlejších kroků, jak z návštěvníků vašeho webu získat reálné zákazníky a kontakty.Okamžitě získají pozornost: Osloví návštěvníka přesně v momentě, kdy je na webu nejvíce zaujatý.Mnohonásobně zrychlí sběr e-mailů: Pop-up okna mají výrazně vyšší úspěšnost konverze než běžný formulář v patičce webu.Zachrání odcházející zákazníky: S funkcí exit pop-up dokážete zobrazit nabídku ve chvíli, kdy se uživatel chystá web opustit, a vrátit ho zpět do hry.Zvýší prodeje: Ideální místo pro časově omezené akce, slevové kódy nebo nabídku dopravy zdarmaCo je to teaser:Teaser je malý prvek, který návštěvníkovi jemně připomíná vaši nabídku – například textem „Získat slevu 10 % 🎁“
Pop-up okno s teaserem (kliknutí na teaser vyvolá pop-up)

Po kliknutí se vám vygeneruje scénář:
1.Nastavení bloku web byl zobrazen:
Publikum: Zde si můžete zvolit, zda se má pop-up zobrazovat známým nebo neznámým kontaktům. Známý kontakt je pro nás ten, kdo splní alespoň jednu tuto podmínku:zaregistruje se do e-shopupřihlásí se k odběru přes pop-upklikne na nějaký odkaz v newsletteru
Pokud nastane jedna z těchto událostí, zákazníka si spárujeme s jeho prohlížečem a my k němu začneme sbírat data. V ostatním případě je pro nás kontakt neznámý.
Podmínky: Zde si můžete nastavit, zda se má teaser zobrazit po určitém čase stráveném na stránce, po určitém procentu zhlédnutí stránky nebo při opuštění stránky. Pokud nastavíte více podmínek, teaser se zobrazí při splnění všech vybraných podmínek zároveň.Cíl: zde si můžete nastavit, aby se teaser zobrazoval jen na určitých stránkách, jen na některé kategorii nebo produktu.
2.Teaser:
Povolit zavření teaseru: můžete nastavit, aby bylo možné teaser zavřít.Design: zde si nastavíte grafiku textu a pozici kde se teaser zobrazí.Náhled: vidíte zde vaše provedené úpravy.
3.Pop-up:
Vytvoříte si pop-up, pomůžou vám s tím naše šablony ze kterých si můžete vybrat styl a a pak upravíte text
Validace e-mailových adres při vyplňování pop-upuChcete zamezit tomu, aby se vám lidé opakovaně přihlašovali přes pop-up, když už se jednou přihlásili? Nastavte si u potvrzovacího tlačítka validaci pop-upu. Klikněte na řádek s potvrzovacím tlačítkem a objeví se vám editační okénko, kde si zaškrtnete pole “Validace při odeslání”.
4. Double opt-inMůže se zdát, že potvrzení e-mailu v doručené poště uživatele jen zdržuje, ale v praxi vám toto nastavení zachrání od překlepů a nefunkčních adres, ochrání vás před spammery.

Tlačítko Přidat e-mail pro double opt-in vás přesměruje do sekce Šablony, ve kterých si ze systémových nebo vlastních vyberete vhodnou šablonu a tu upravíte.
Důležitou součástí potvrzovacího mailu je tlačítko Ověření mailu.¨
Přidat kontakty do seznamu: zde si vyberete do jakého z vašich seznamů se kontakt přiřadí, jakmile potvrdí mail.
Poslední krok je přidání bloku odeslat mail a zde nastavit šablonu, která se zákazníkovi pošle po potvrzení double opt-inu.

Jakmile zákazník odběr potvrdí, systém mu automaticky odešle uvítací e-mail. V něm nového odběratele přivítáte v e-shopu a součástí je i slíbený slevový kupón.
Kampaň máte hotovou a můžete spustit.
Incomaker offers an MCP server that you can use to control it through various popular AI agents. Connecting them to Incomaker is described in this article. Here we’ll look at how to connect the Incomaker MCP server to Perplexity.
Incomaker will soon be available in Perplexity’s app catalog, but until then, the MCP can be fully used in developer mode. From a user’s perspective, there is no difference. During the connection process, Perplexity will warn you about security risks. If you follow this procedure correctly, you don’t face any security risks, but it is somewhat more laborious than connecting a registered app. The registered Incomaker app should appear in Perplexity in the near future.
In Perplexity, open Connectors.

Click Add Custom Connector:

Enter the required information into the following table.
Use the following icon:

Then proceed to Advanced.

In the Client ID field, enter the E-shop UUID, which you can find in Incomaker under E-shop Info in the bottom left:

You’ll also need to confirm the risk disclosure statement. However, if you’ve followed this procedure exactly and haven’t disclosed your API keys or other codes to anyone, you don’t need to worry.

You should now see the login screen for the Incomaker app. Click Sign in with Incomaker:

Expand it and click Add Connector in the top right corner.
Finally, a dialog box should appear prompting you to enter your API key. You’ll also find this in Incomaker, on the same page as the E-shop UUID from before.
After that, the MCP server should fully connect and respond to your queries. You could try, for example: “Give me the results of a few campaigns from the last month”
Incomaker offers an MCP server that allows you to control it through various popular AI agents. Instructions for connecting those agents to Incomaker are described in this article tomto článku . Here, we will look at how to connect the Incomaker MCP server to ChatGPT.
Incomaker will soon be available in the ChatGPT app directory, but until then, the MCP server can be fully used in developer mode. From a user perspective, there is no difference. During the connection process, ChatGPT will display security warnings. If you follow this procedure, you will not face any security risks; however, the setup process is slightly more involved than connecting a registered application. The registered Incomaker application should appear in ChatGPT in the near future.
In ChatGPT, open Settings.

Open the Advanced settings menu (right arrow):

Enable Developer Mode and return to the previous menu.

Enter the required information (see image). The Name, Connection, and Authentication fields are absolutely critical. To maintain better organization and clarity, we also recommend providing a Description and Icon.
Use the following icon:
Then continue to Advanced OAuth Settings.

In the OAuth Client ID field, enter the E-shop UUID, which can be found in Incomaker under E-shop Info in the bottom-left corner:


You must also acknowledge the risk warning. However, if you have followed this procedure exactly and have not shared your API keys or any other codes with anyone, there is no need for concern.

You should now see the Incomaker login screen. Click Sign in with Incomaker:

Finally, you should see a dialog box prompting you to enter an API key. You can also find this in Incomaker on the same page where you previously located the E-shop UUID.
After that, the MCP server should be fully connected and ready to respond to your requests. You can try something like: “Show me the results of several campaigns from the last month.”
What is Incomaker MCP?
Incomaker MCP (Model Context Protocol) is a server that allows AI agents (such as Claude, Codex, Cursor, etc.) to access your account’s data and analytics. Simply state the requested tasks to the agent in natural language.
⚠️ Important note: In the current version, the connection works in read-only mode. The tool is therefore primarily intended for data analysis, reporting, and retrieving information. Currently, it cannot be used to create new campaigns, upload contacts, or modify settings.
Examples of what you can ask (reading and data analysis):
• “Show me the campaign performance for the last month.”
• “Which conversion SmartFlows have the highest revenue?”
• “How many contacts unsubscribed in February?”
• “Which products do customers most often buy together?”
Where can I find my API key?
For a successful connection, you will need your unique API key. You can get it as follows:
1. Log in to your Incomaker account. 2. Go to the E-shop info section. 3. At the bottom left of the page, you will find the API key item. 4. This token is exclusively yours and is secret. Copy it and replace the text YOUR_API_KEY with it in all the examples below.
The universal server address for all platforms is: https://mcp.incomaker.com/mcp
Setup for your platform
If you do not want to edit files manually, you can simply tell your AI tool that you want to install this MCP server and provide the given code with your API key. After successful installation, restart the application.
Opencode
For Opencode, the designation “remote” is used in the configuration instead of the standard “http” type. Add the following code snippet to your configuration file and do not forget to insert your API key:
{ “mcpServers”: { “incomaker”: { “type”: “remote”, “url”: “https://mcp.incomaker.com/mcp”, “headers”: { “Authorization”: “Bearer YOUR_API_KEY” } } }}
Claude Desktop
Open the configuration file for the Claude Desktop application:
• macOS: ~/Library/Application Support/Claude/claude_desktop_config.json• Windows: %APPDATA%Claudeclaude_desktop_config.jsonAdd a new mcpServers section to it:
{ “mcpServers”: { “incomaker”: { “type”: “http”, “url”: “https://mcp.incomaker.com/mcp”, “headers”: { “Authorization”: “Bearer YOUR_API_KEY” } } }}
After saving the file, restart the Claude Desktop application. You will then find the available Incomaker tools under the MCP icon.
Claude Code (CLI)
In the root folder of your project (or in your home folder for global settings), create or edit the .mcp.json file. Paste the same configuration into it as shown above for Claude Desktop, and save the file.
The server will be detected automatically, which you can verify with the > health_check command.
Cursor
In the Cursor editor settings, go to Settings → MCP and add a new server with the following details:• Name: incomaker• Type: HTTP• URL: https://mcp.incomaker.com/mcp• Authorization Header: Bearer YOUR_API_KEY
OpenAI Codex (CLI)
You can add a new server by simply running this command in your terminal:
codex mcp add incomaker –transport streamable_http –url https://mcp.incomaker.com/mcp –header “Authorization: Bearer YOUR_API_KEY”
You can then verify the configuration by entering the command codex mcp get incomaker.
ChatGPT
How to connect the Incomaker MCP server to standard ChatGPT:
Incomaker will soon be available in the ChatGPT app catalog, but until then, you can fully utilize the MCP in developer mode. From a user perspective, there is no difference. During the connection process, ChatGPT will warn you about security risks. As long as you follow this procedure, you face no security risks; however, it is slightly more labor-intensive than connecting a registered app. The registered Incomaker application is expected to appear in ChatGPT in the near future.
In ChatGPT, open Settings.

Open the Advanced settings menu (arrow on the right):

Turn on Developer Mode and return to the previous menu.

Enter the required details (see image). Name, Connection, and Authentication are absolutely critical. To maintain clarity and organization, we also recommend adding a Description and an Icon.
Use the following icon:
Then proceed to Advanced OAuth Settings.

In the OAuth Client ID field, enter the E-shop UUID, which you can find in Incomaker under E-shop Info in the bottom left corner:

You will also need to confirm the risk disclaimer. However, if you have followed this procedure exactly and have not disclosed your API keys or other codes to anyone, you have nothing to worry about.
You should now see the login screen for the Incomaker application. Click Log in via Incomaker:

Finally, a dialog box prompting you to enter your API key should appear. You can find this in Incomaker as well, on the same page where you just found the E-shop UUID.
After that, the MCP server should fully connect and respond to your queries. For example, you can try: “Give me the results of a few campaigns from the past month.”
Perplexity
Incomaker offers an MCP server that you can use to control it through various popular AI agents. Connecting them to Incomaker is described in this article. Here we’ll look at how to connect the Incomaker MCP server to Perplexity.
Incomaker will soon be available in Perplexity’s app catalog, but until then, the MCP can be fully used in developer mode. From a user’s perspective, there is no difference. During the connection process, Perplexity will warn you about security risks. If you follow this procedure correctly, you don’t face any security risks, but it is somewhat more laborious than connecting a registered app. The registered Incomaker app should appear in Perplexity in the near future.
In Perplexity, open Connectors.
Click Add Custom Connector:
Enter the required information into the following table.
Use the following icon:
Then proceed to Advanced.
In the Client ID field, enter the E-shop UUID, which you can find in Incomaker under E-shop Info in the bottom left:
You’ll also need to confirm the risk disclosure statement. However, if you’ve followed this procedure exactly and haven’t disclosed your API keys or other codes to anyone, you don’t need to worry.
You should now see the login screen for the Incomaker app. Click Sign in with Incomaker:
Expand it and click Add Connector in the top right corner.
Finally, a dialog box should appear prompting you to enter your API key. You’ll also find this in Incomaker, on the same page as the E-shop UUID from before.
After that, the MCP server should fully connect and respond to your queries. You could try, for example: “Give me the results of a few campaigns from the last month”
Sto stands for Send Time Optimization, so send time optimization. It is an intelligent email scheduling feature that helps deliver a message to the right person at the right time—when they are most likely to notice, open, and read the email. Instead of sending a campaign to all contacts at once, Incomaker spreads email delivery throughout the day based on when individual customers typically check their inbox.
Incomaker analyzes the previous behavior of contacts, particularly email opens and past email interactions. Based on this data, it schedules delivery so that each customer receives the email at a time when they are usually active or most likely to engage with their email.
The goal of STO is to increase the likelihood that a customer notices the email at the most appropriate moment. As a result, the feature can help improve campaign open rates.
How STO works
With STO enabled, the campaign does not behave like a one-time mass sending to all contacts at once. The sending is only started at the selected time and the emails are then delivered gradually over the following 24 hours.
For example, if you set a scheduled start for 21. 6. 2026 at 7:05 and you turn on STO, the campaign will start at that time. However, the individual emails will not be sent all at once. Incomaker will spread them out over the course of the day according to the activity of individual contacts.
STO is most beneficial for databases where people read emails at different times. For example, the difference may be more pronounced for contacts spread across multiple time zones. In Europe, where most contacts often travel in one or two time zones, the impact may not be as significant as in the US, for example. Still, STO can help because people have different daily habits and read emails at different times.
Where can STO be set up?
STO settings are configured in the Trigger activity, where all available launch methods are managed. The process is therefore the same for Immediate Start, Repeated Start, and Scheduled Start. Within the settings, simply select the desired launch type in the Trigger activity, enter the required parameters according to the selected mode, and save the settings. This keeps the entire process unified and eliminates the need to describe each launch type separately.
1. Scheduled start
You can enable STO for campaigns that are scheduled to run on a specific day and time.
This includes:
-
One-time campaign with a booster
-
News notifications
For these campaigns, the sending starts at the selected time and Incomaker then distributes the delivery of emails over the next 24 hours according to the historical activity of individual contacts.
2. Instant start
You can also use STO for campaigns that launch immediately.
This includes:
-
Simple one-time campaign
For this campaign, the sending will start immediately after the campaign is launched. If STO is enabled, emails will not be sent to all contacts at once, but will be delivered sequentially over the next 24 hours based on when each recipient is most likely to open.
3. Repeated start
You can also enable STO for campaigns that run repeatedly according to a set rule.
This includes:
-
Smart campaign
-
Reaching inactive customers
For these campaigns, STO is used on each re-run. Incomaker will always spread out the delivery of emails within a given run so that each contact receives the message at a more appropriate time.
STO is therefore not available for all campaign types, but only where send time optimization provides a practical benefit.
For campaigns such as Pop-up, Holiday, Birthday, Abandoned Cart, or Follow-up After the Event, STO is not used because these campaigns either do not send a traditional mass email newsletter or are tied to a specific event, date, or customer action. Therefore, use STO primarily for campaigns where you want to reach a group of contacts with a marketing email while increasing the likelihood that each recipient receives the message at a more appropriate time.
How to set up STO
STO is activated simply by turning on the switch. STO is activated simply by turning on the STO switch in the Starter activity, the same for all types of starts:
You can enable STO in an activity Scheduled start. You will mainly use this option if you want to start the campaign on a specific day and time.
- Open Smart Flow in which you want to use STO (One-time campaign with re-send, News notification, Simple one-time campaign, Smart campaign, Inactive customer outreach).

- Double-click to open the activity “Scheduled start / Immediate start / Repeated start”.

- At the bottom of the Launcher, you will find “Send Time Optimization (STO)”. Turn on the toggle for this option.
-
Continue as you normally would when creating a SmartFlow.
This activates STO. No additional parameters need to be set – the function is simply activated with a switch.
Important to know
After enabling STO, the campaign will not be sent to all contacts at the exact selected time. At the selected time, the sending process only begins, and the system then delivers emails to individual contacts over the next 24 hours based on their historical activity.
For a Scheduled Start, the optimized sending begins from the specific date and time you select. For a Repeated Start, the same principle is applied each time the campaign is triggered.
STO is best used for campaigns where you want to increase the likelihood that contacts receive emails at a more appropriate time. The feature can be enabled in the Scheduled Start or Repeated Start activity within SmartFlow.
Summary
STO is an important feature for smarter and more effective email campaign delivery. It helps ensure that each email is delivered at the time when a specific customer is most likely to notice, open, and read it.
Instead of sending emails to all contacts at once, Incomaker distributes delivery over 24 hours based on the historical activity of individual recipients. As a result, the campaign is better aligned with customer habits and can achieve better results, particularly higher open rates.
STO is especially valuable for campaigns where timing matters. Enabling it is very simple – just activate the Send Time Optimization (STO) switch in the Scheduled Start or Repeated Start activity within SmartFlow. For an Immediate Start, sending begins immediately. When STO is enabled, emails are delivered gradually over 24 hours based on the likelihood of each recipient opening the message.
Moving to the new Incomaker NEXT interface and working with SmartFlow brings a number of benefits, but it’s natural for questions to come up during any change. In this chapter, you’ll find answers to the most frequently asked questions that arise when switching to SmartFlow.
Do I have to recreate my campaigns?
No, you don’t.
The basic logic of your campaigns, the way you work with data, and your filters and audiences all stay the same. The new interface mainly changes the way you view and edit campaigns. SmartFlow helps you understand and manage your campaigns better — not build them from scratch.
Will the behavior of my existing campaigns change?
No.
Your campaigns’ behavior stays as it is unless you make changes to them yourself.
The new interface:
-
doesn’t change campaign logic,
-
doesn’t interfere with your data,
-
it simply displays their structure more clearly.
Is working with SmartFlow more complicated than before?
Quite the opposite
SmartFlow is designed to make your work easier, especially with more complex scenarios.
Thanks to the visual layout:
-
you better understand the connections between steps,
-
you navigate the campaign more easily,
-
you spot any logic errors faster.
Can I edit campaigns even after launching them?
Yes, campaigns can be edited even after they’ve been launched.
When editing active campaigns, however, it’s wise to proceed carefully and always check how your changes will affect their operation.
If you’re planning major changes, we recommend stopping the campaign first.
What about templates in the new interface?
The principle of working with templates stays the same; what changes is how they’re displayed and how they’re linked to SmartFlow.
The new interface lets you:
-
better see where templates are used,
-
more easily check how they connect to campaign steps,
-
manage their edits more efficiently.
What if I get lost in the new interface?
If you’re not sure:
-
go through the campaign’s entire SmartFlow from top to bottom,
-
focus on the main branches and how they connect,
-
use the campaign overview to check their status.
The visual structure of SmartFlow helps you get your bearings faster than in the original interface.
Is the new interface suitable for advanced scenarios too?
Yes.
SmartFlow is designed to handle both simple and very complex campaigns with multiple branches and conditions.
It’s precisely with more complex scenarios that you’ll most appreciate:
-
the clarity,
-
the easy editing,
-
and the better control over the entire campaign flow.
Summary
The new Incomaker NEXT interface and SmartFlow:
-
preserve the system’s existing operating principles,
-
bring a better overview and control,
-
and make everyday work with campaigns and templates easier.
Once you get used to the new way of working, it’ll become a natural tool for managing your automation.
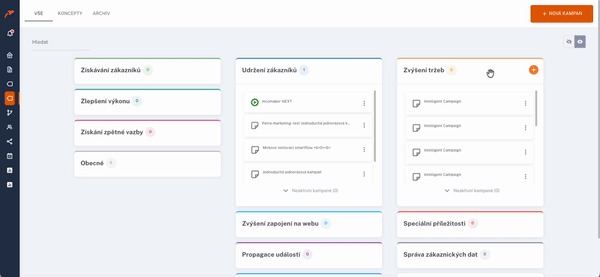
This guide will walk you through the new Incomaker NEXT interface and explain how to work with SmartFlow step by step.
First, we’ll show you how to get into SmartFlow.
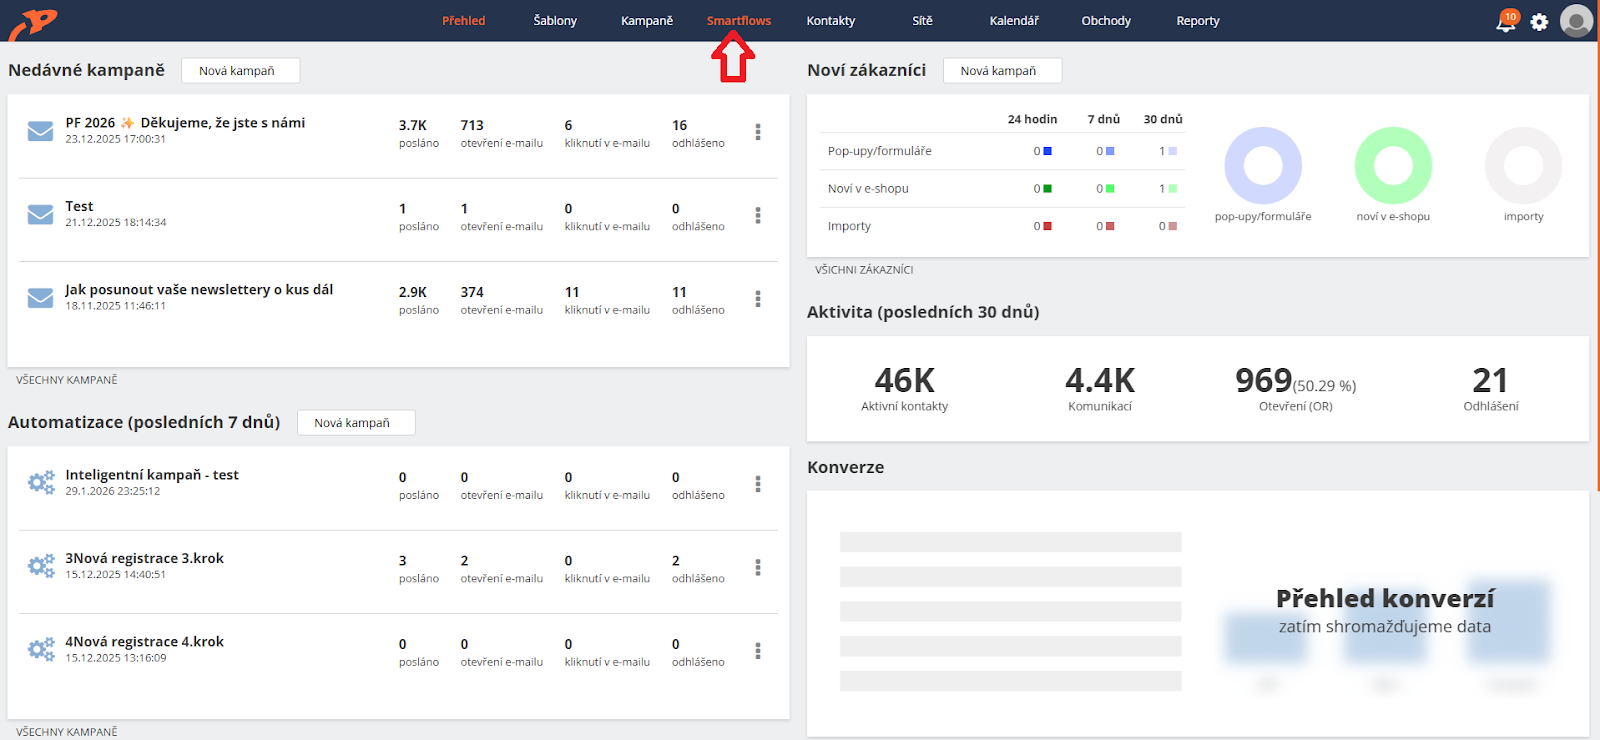
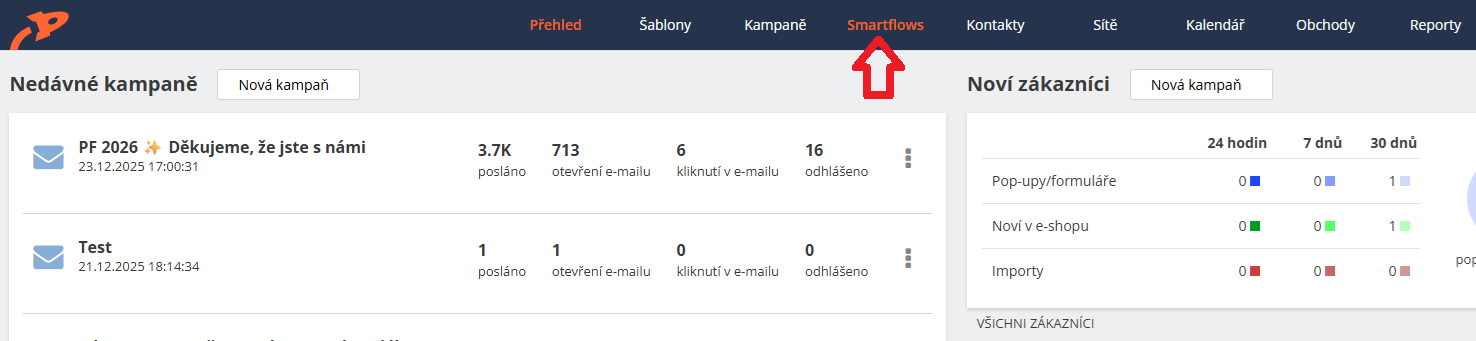
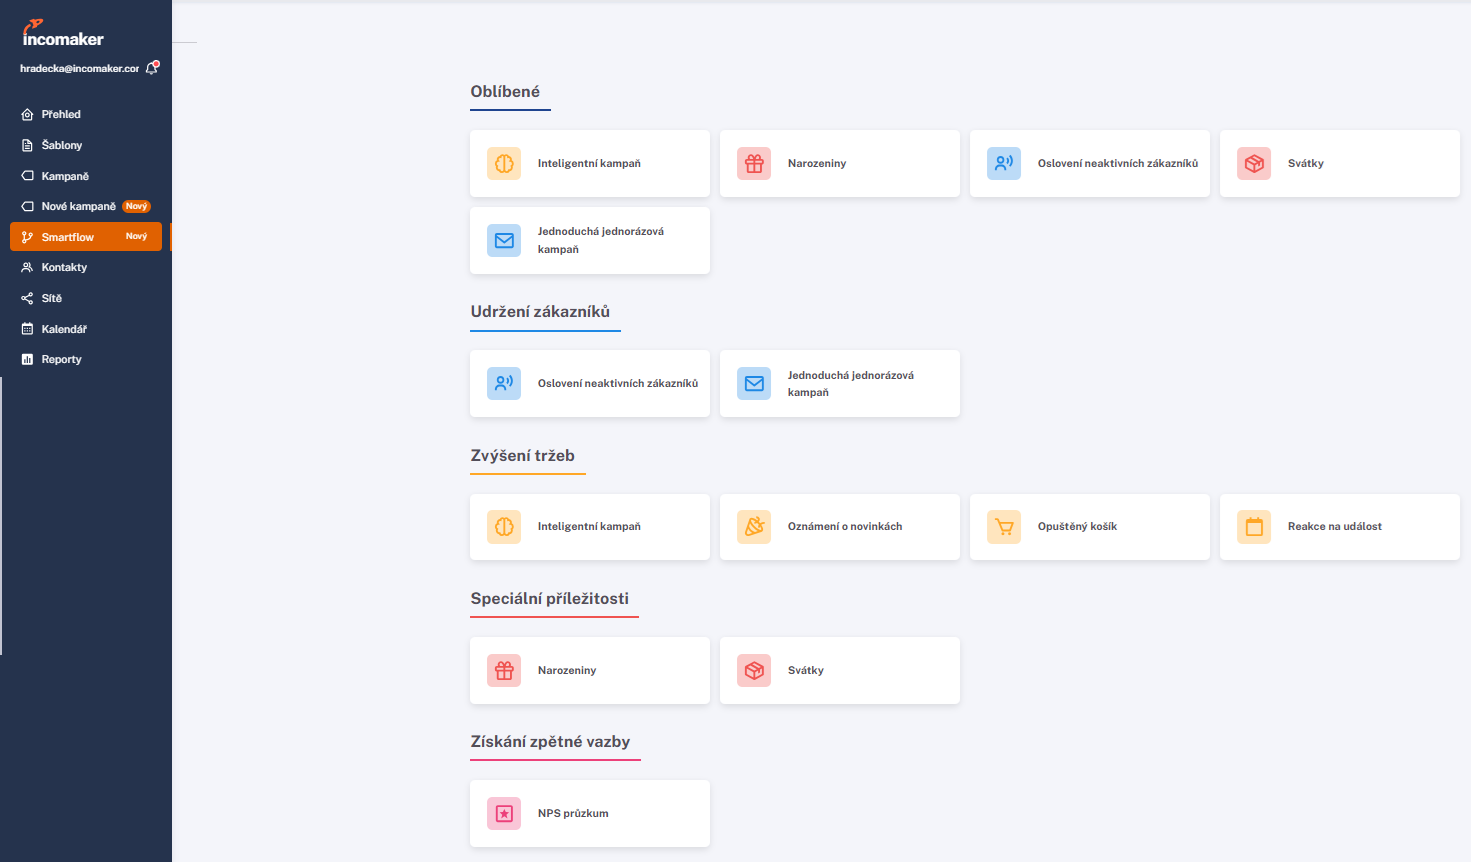
1. Welcome to SmartFlow
Think of SmartFlow as a smart construction set that handles routine tasks for you. You don’t need to program anything — you just put a few basic pieces together.
SmartFlow always answers three basic questions:
-
✔️ What starts it? (Trigger) — for example, a specific date and time, when someone abandons their cart, or when it’s someone’s name day,
-
✔️ Where should it go? (Target) — selected contacts from lists, based on filters, or according to how the communication branches,
-
✔️ What should happen? (Action) — for example, SmartFlow sends an email or an SMS, or updates a contact’s data.
2. You Don’t Have to Start from Scratch
Even though you can build everything entirely your own way, the easiest approach is to start with our ready-made templates. They’re finished “recipes” for the most common situations, which you just tweak slightly so they fit your needs exactly.
-
✔️ templates speed up your start,
-
✔️ they help you keep a proven structure,
-
✔️ you can add your own branches and steps to them at any time.
3. Work Without Worry
There’s nothing complicated to confirm, and no need to fear a power outage.
-
✔️ SmartFlow instantly remembers and automatically saves every step you take,
-
✔️ you can step away at any time and return to your work exactly where you left off,
-
✔️ everything is saved to drafts, which you’ll find under your campaigns.
4. Start Here
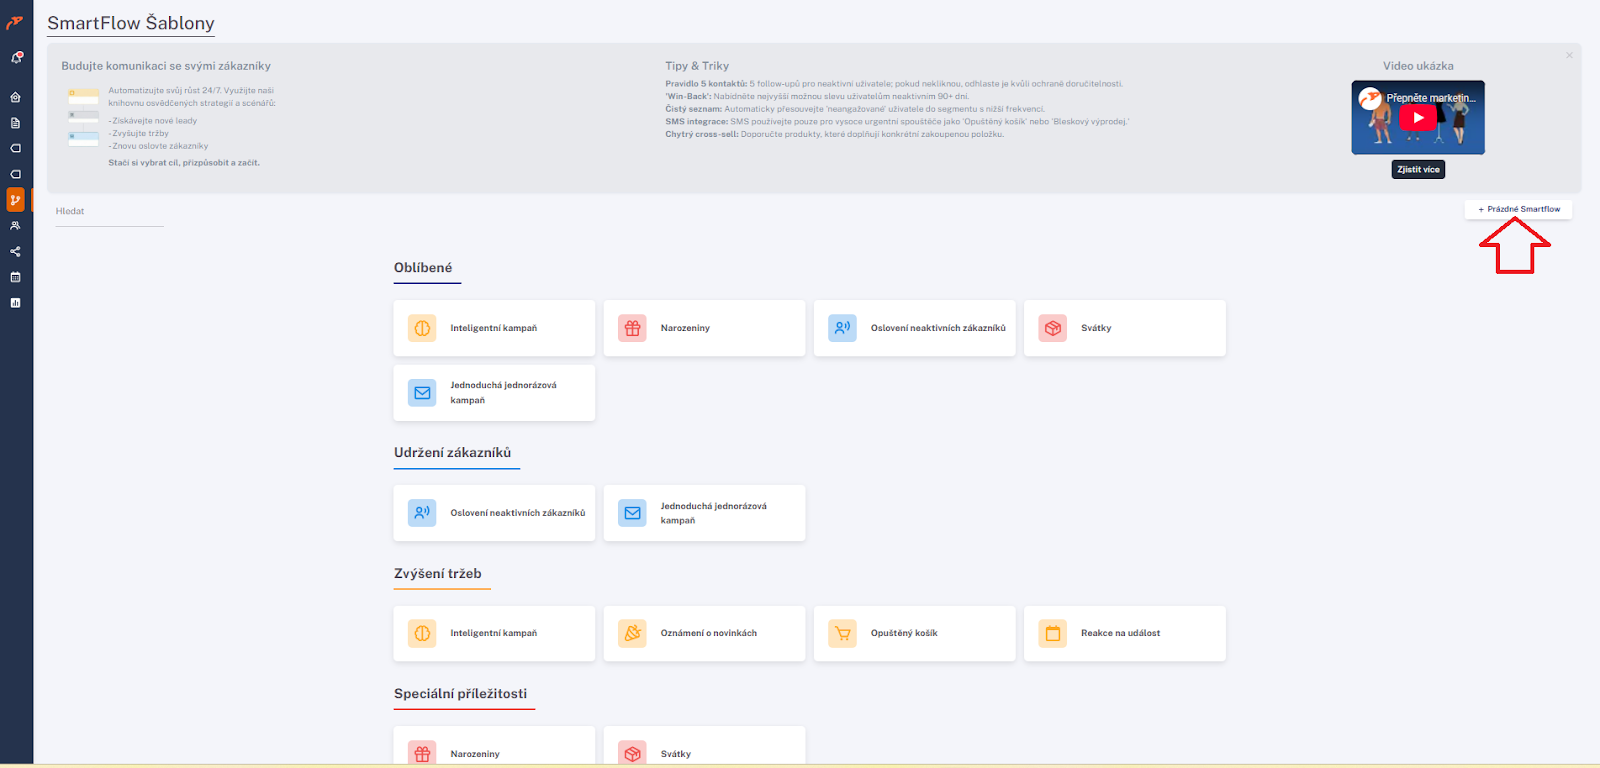
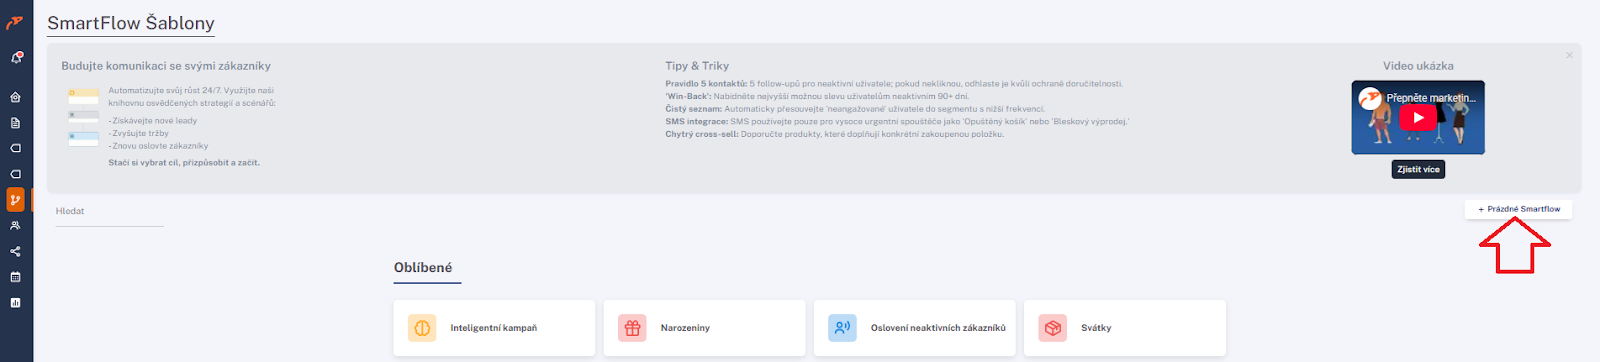
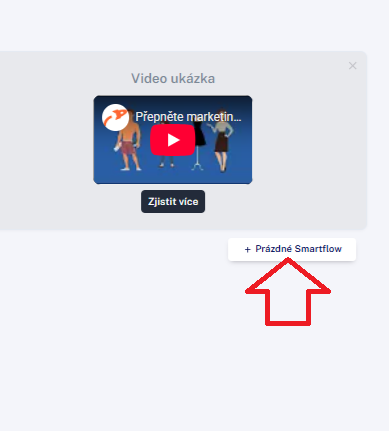
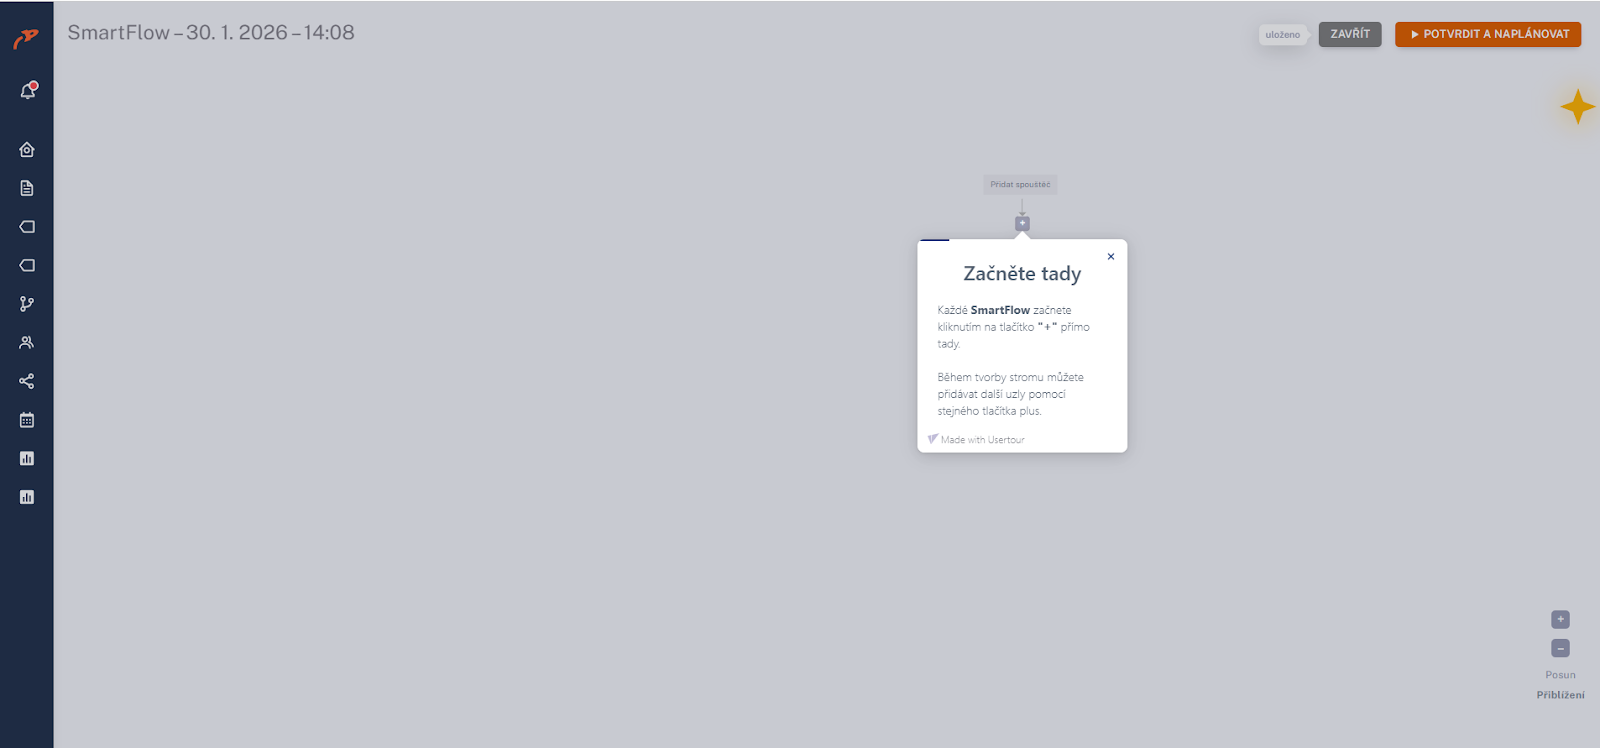
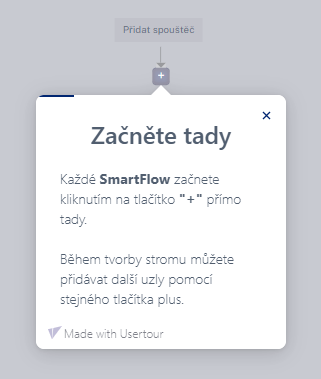
You begin every SmartFlow by clicking the “+” button right in the editor.
✔️ the first click creates a new flow,
✔️ as you build the tree, you can add more nodes using the same “+” button,
✔️ the entire campaign tree comes together gradually before your eyes.
5. Choose a Trigger
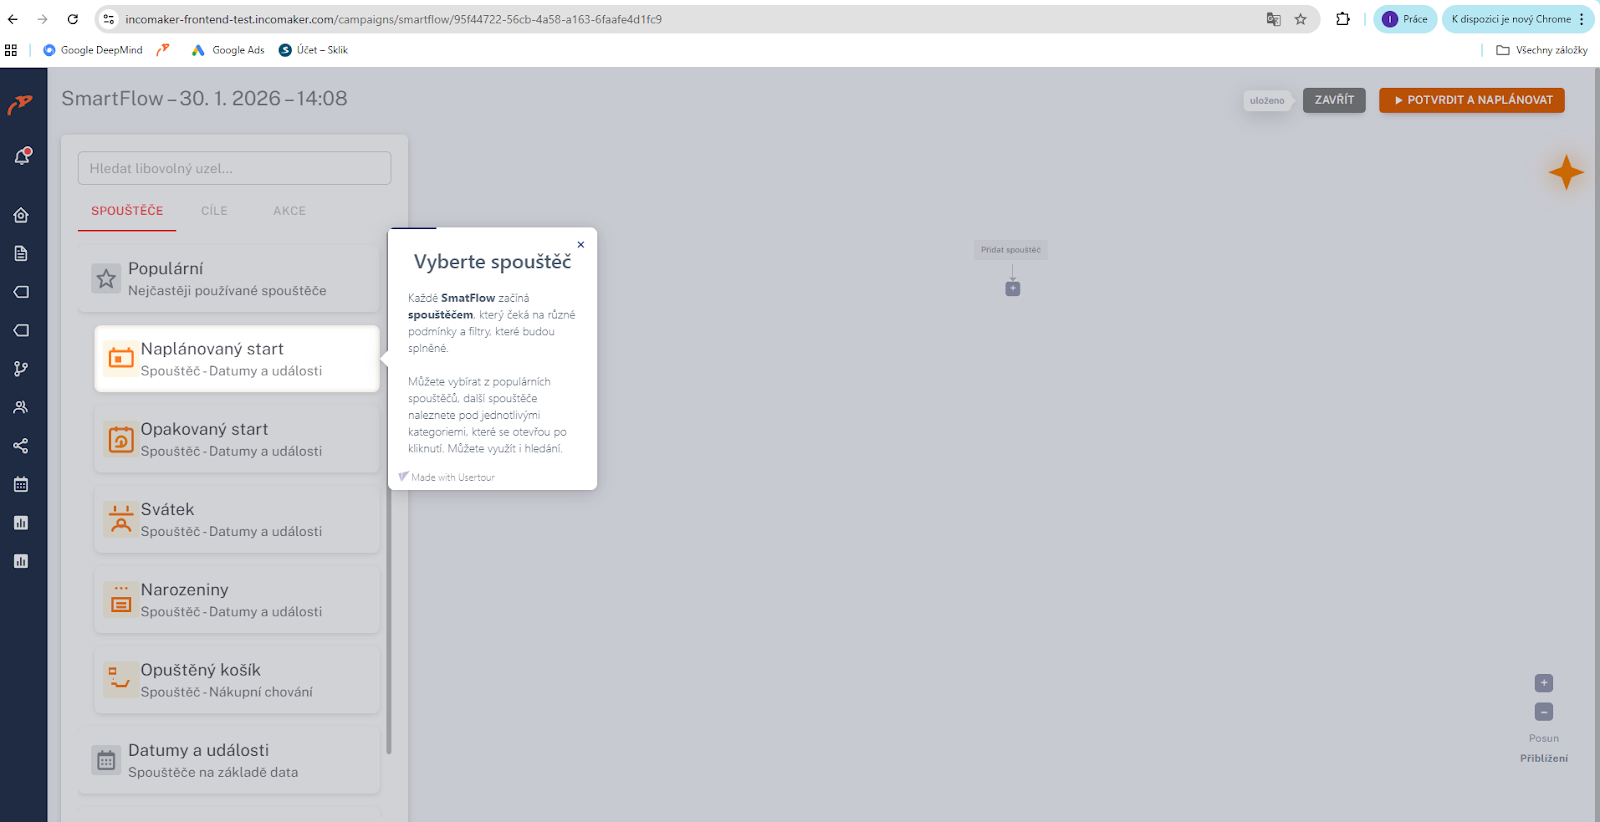
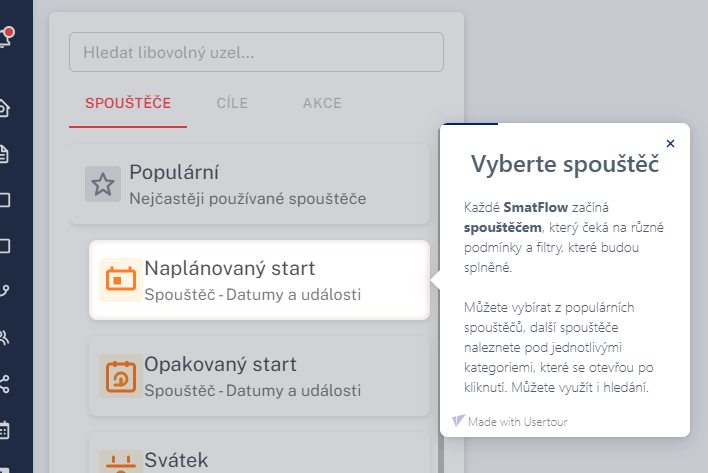
Every SmartFlow begins with a trigger that waits for the conditions and filters that must be met.
✔️ you can choose from popular triggers,
✔️ you’ll find more triggers in the categories that open when you click,
✔️ you can also use the search function.
6. The Main Starting Trigger
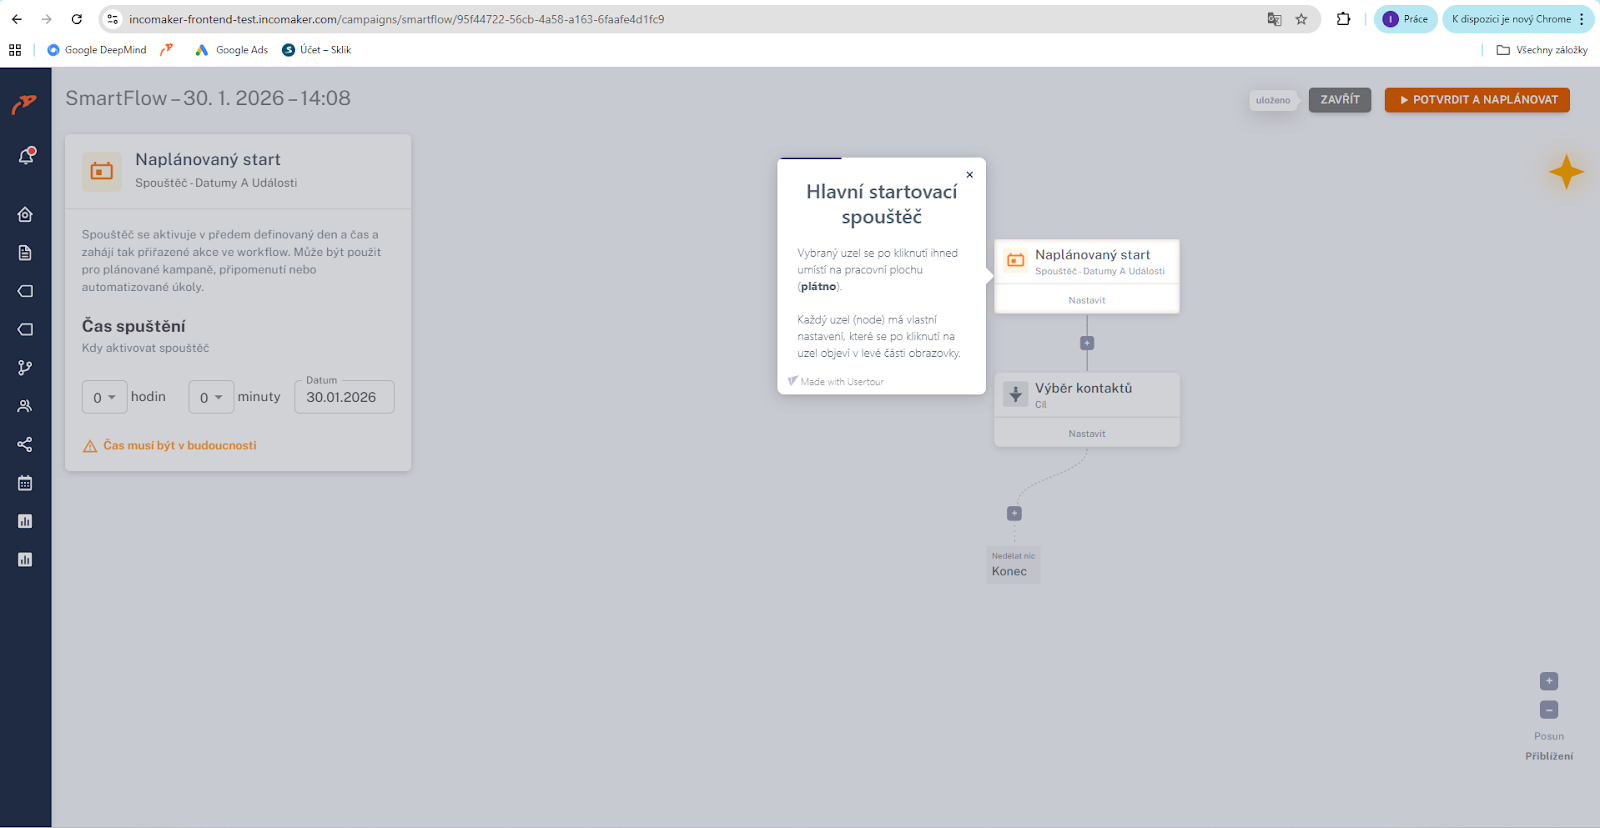
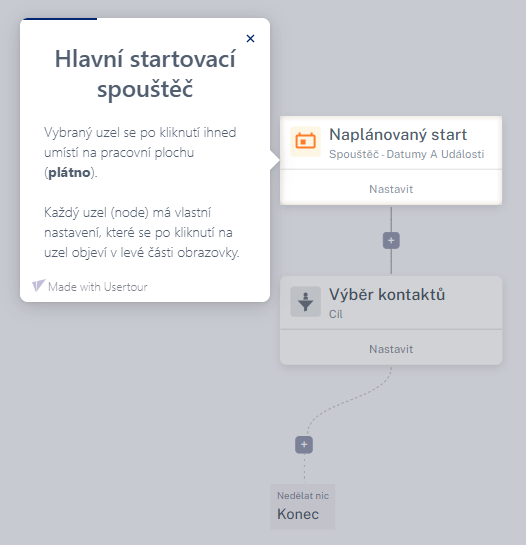
Once clicked, the selected node is immediately placed on the workspace (the canvas).
✔️ each node has its own settings,
✔️ the settings appear on the left side of the screen when you click a node,
✔️ changes are saved automatically.
Settings for Each Node
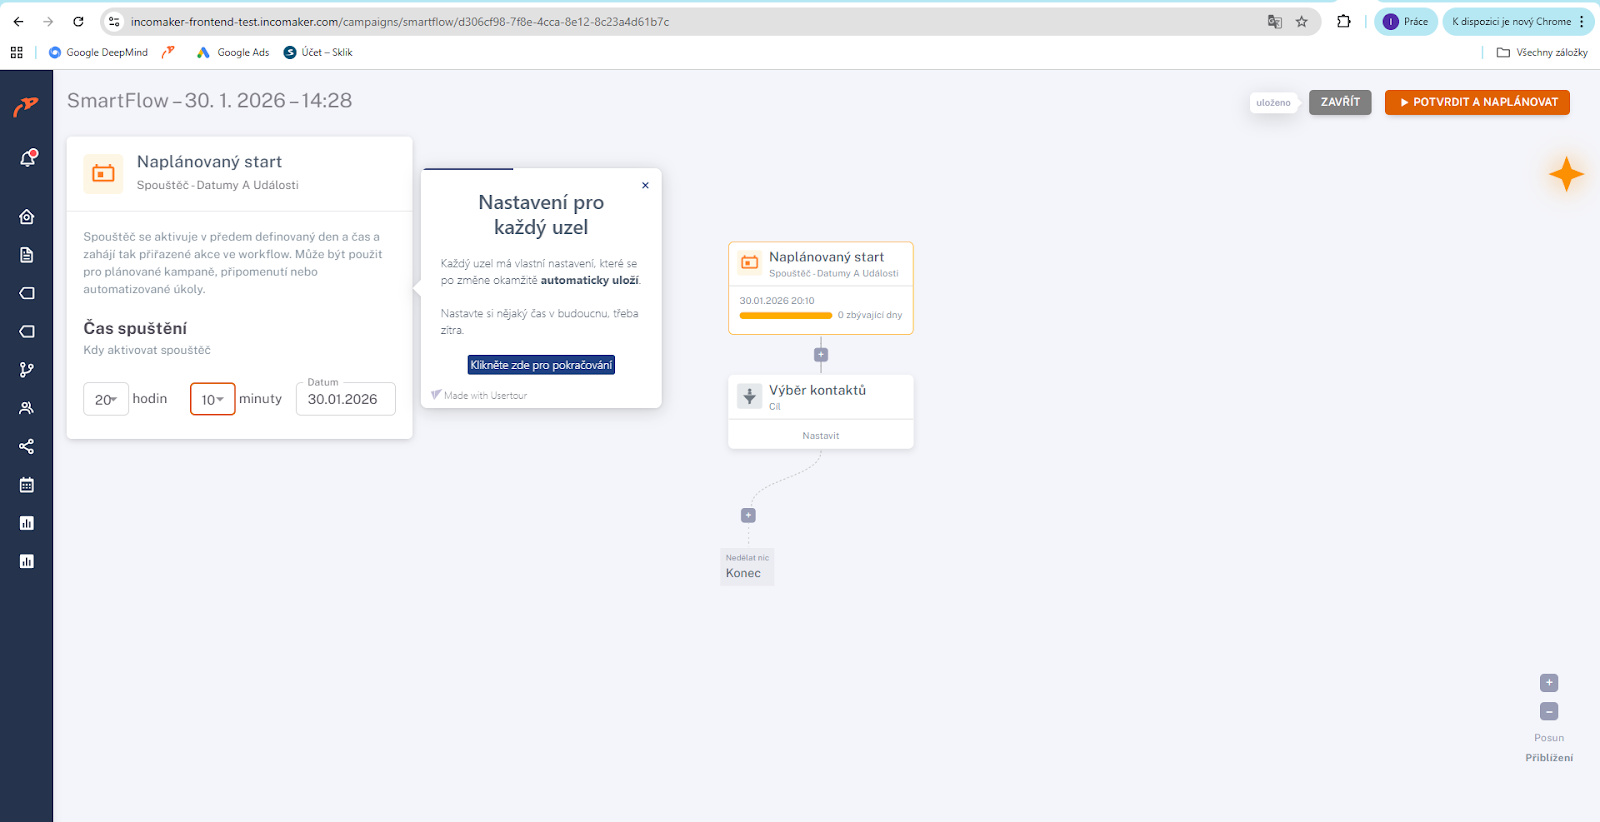
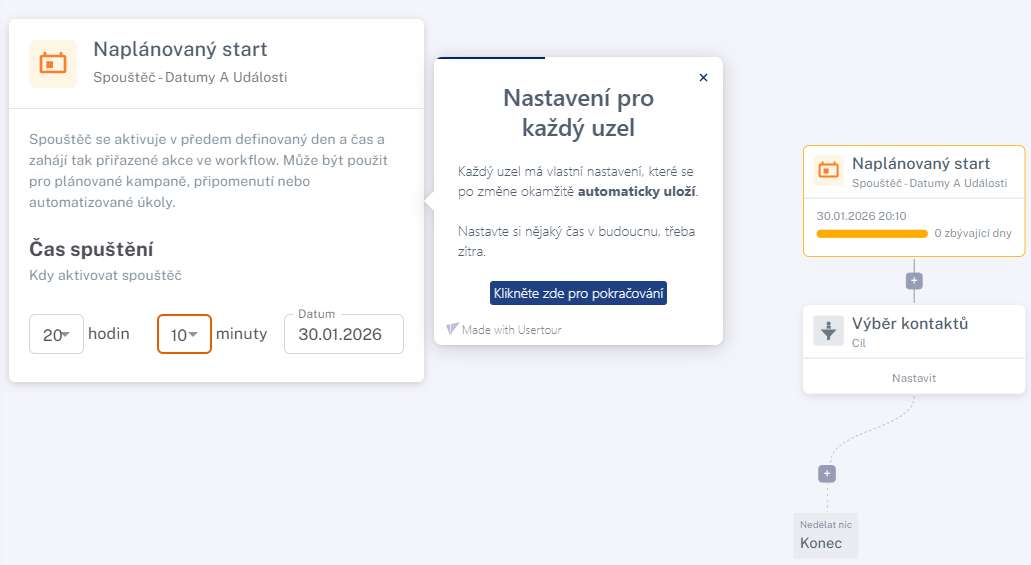
Each node has its own settings, which are automatically saved the moment you change them. For your first try, set something like a time in the future — tomorrow, for example.
7. Select the Starting Contacts
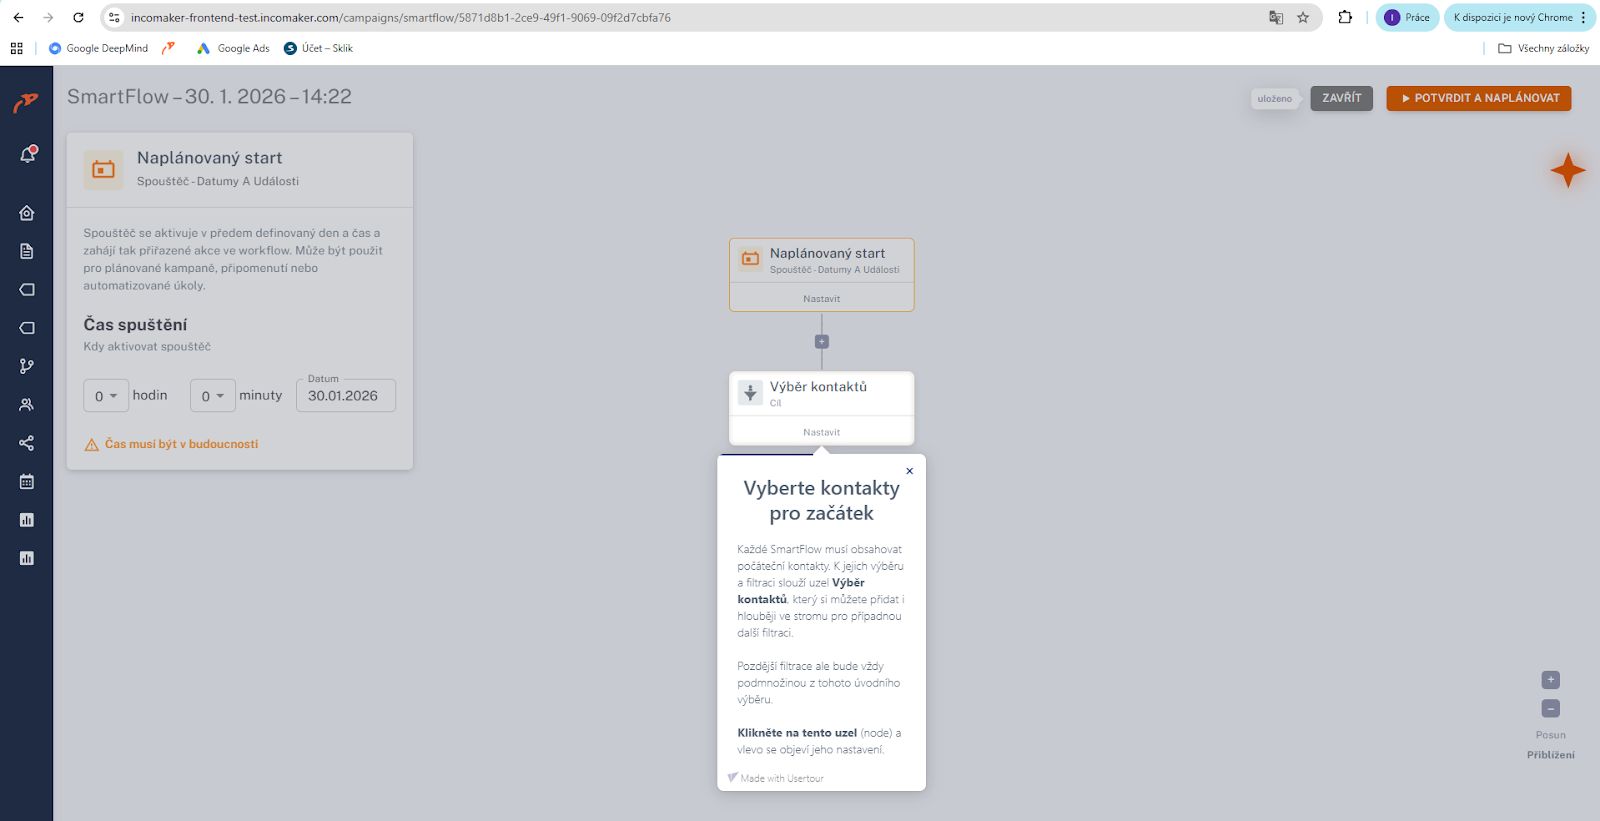
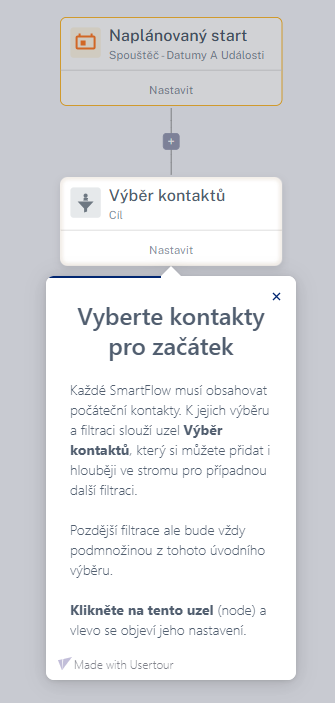
Every SmartFlow must contain a set of starting contacts. The Contact Selection node is used to select and filter them, and you can also add it deeper in the tree for any further filtering. Later filtering will always be a subset of the initial selection:
✔️ click a node and its settings will appear on the left.
8. Contact Settings
On the settings panel of the Contact Selection node, you can adjust the selected contacts:
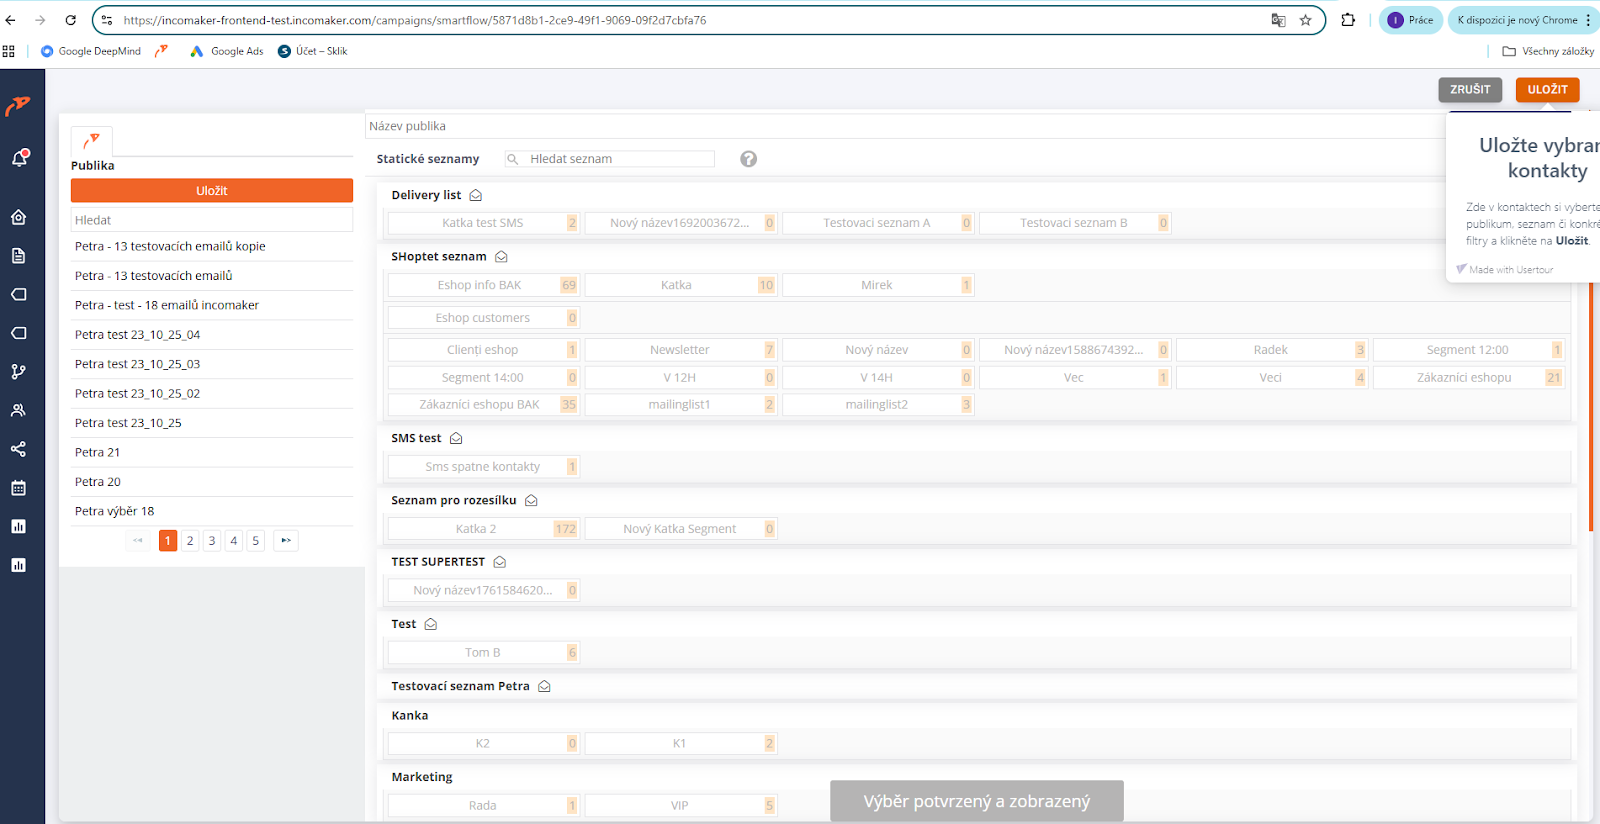
✔️ click the orange Edit button, which opens the standard contact selection and filtering in Incomaker,
✔️ select an audience, a list, or specific filters,
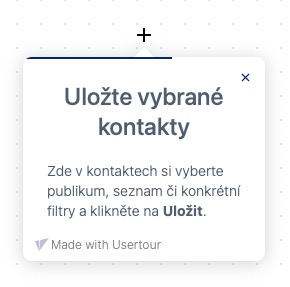
✔️ click Save in the top right corner.
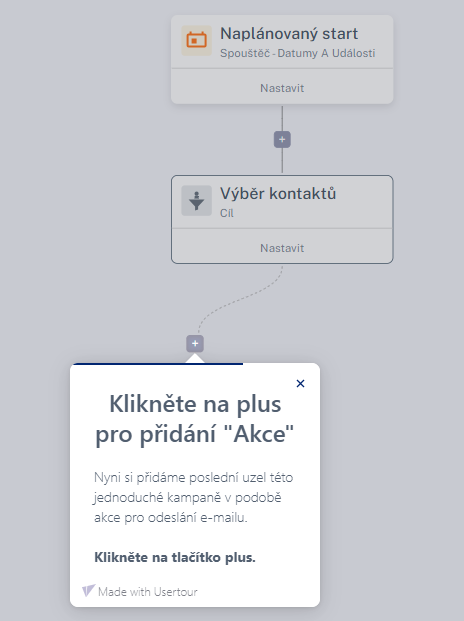
9. Click the Plus to Add an Action
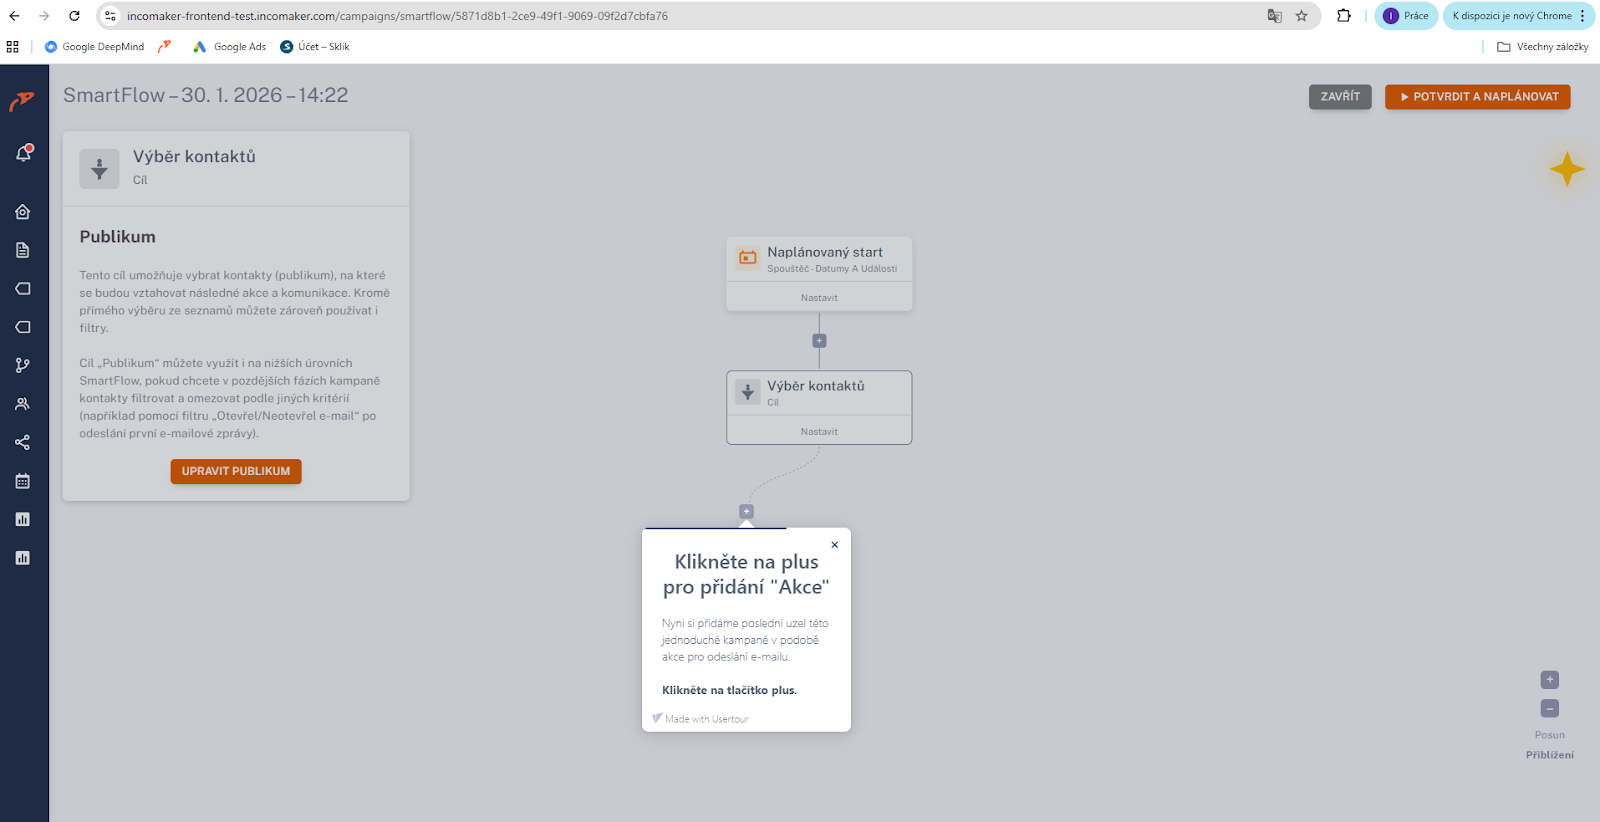
Now you’ll add the final node of this simple campaign — an action to send an email.
✔️ click the “+” button,
✔️ select the action you want to perform in SmartFlow.
10. Select the “Send Email” Action
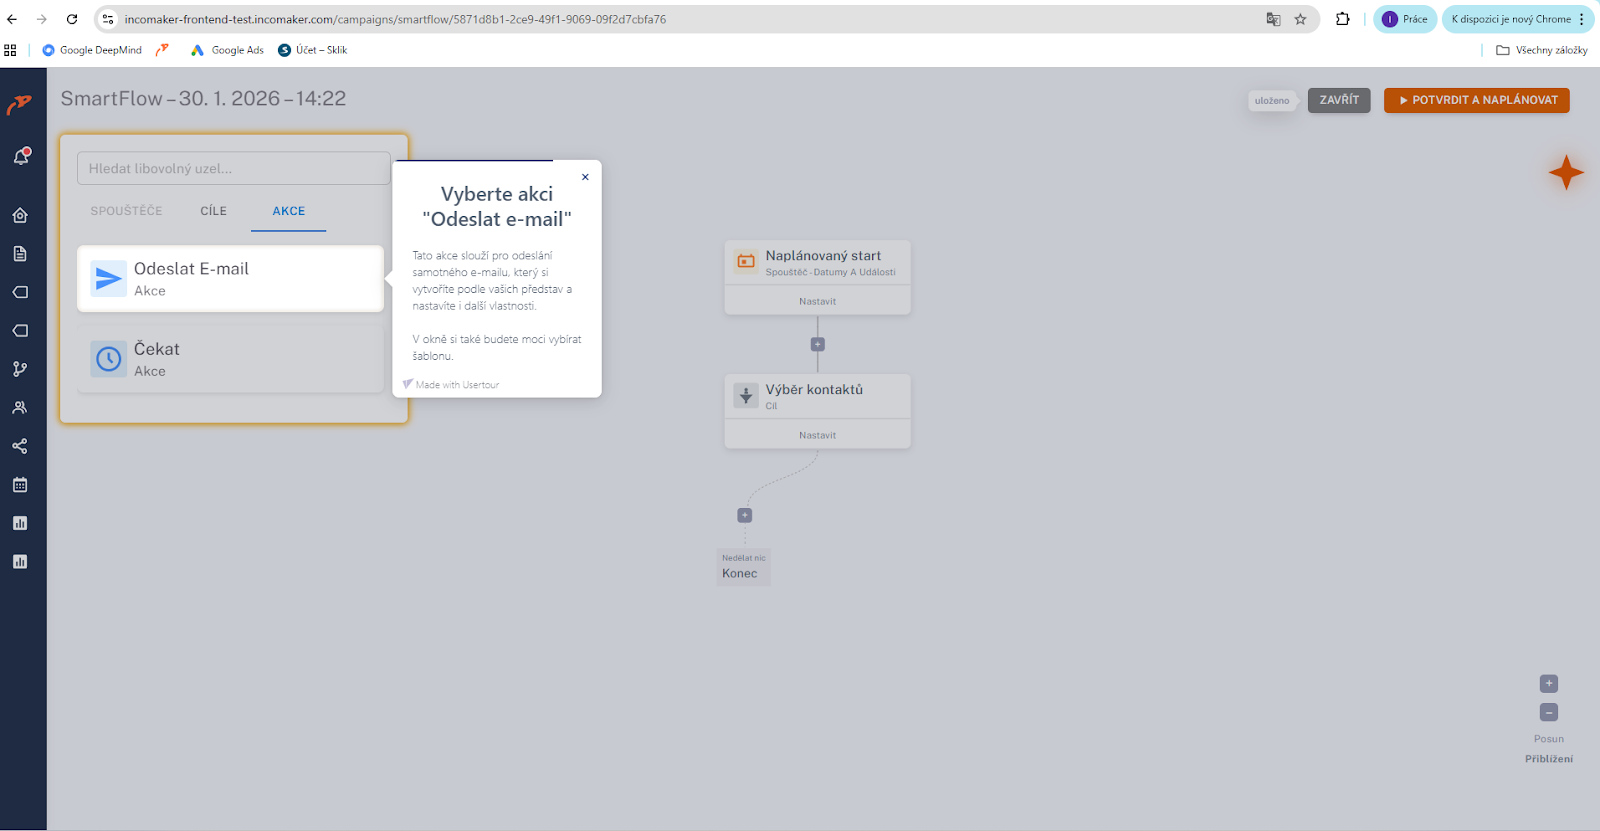
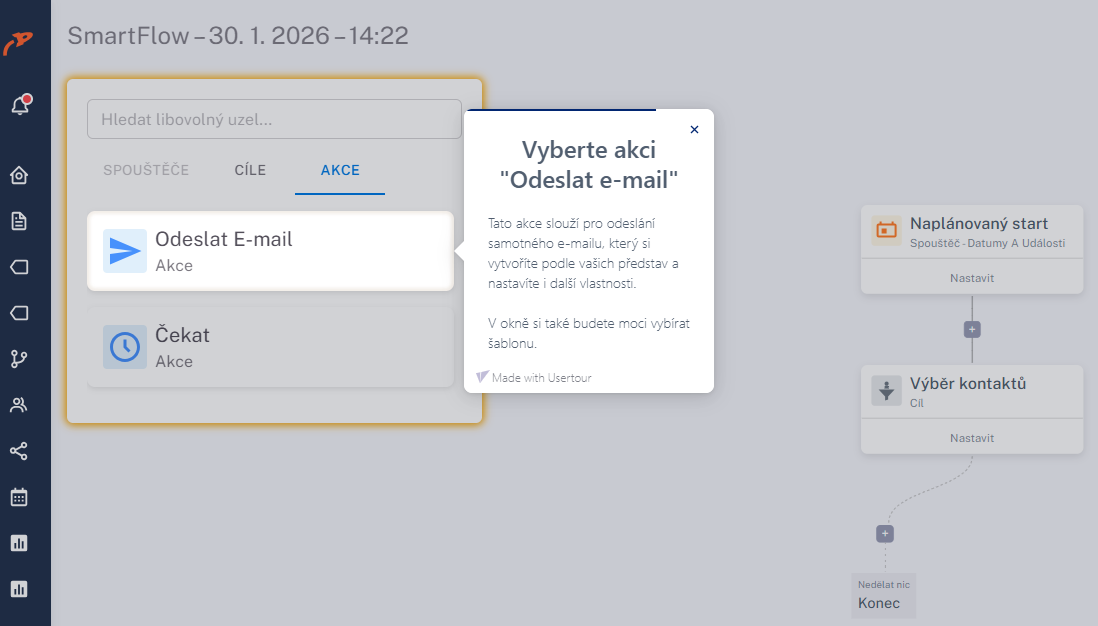
This action is used to send the actual email, which you create to your liking and for which you can set further properties.
✔️ in the window you can choose a template,
✔️ you can edit the email in the editor.
11. Email Settings
On the settings panel of the Send Email node, you access the selection and setup of the email that will be sent.
✔️ click the orange Edit button,
✔️ the standard Incomaker email editor opens,
✔️ after editing, click Confirm in the top right corner.
12. Choose a Template and Edit the Email
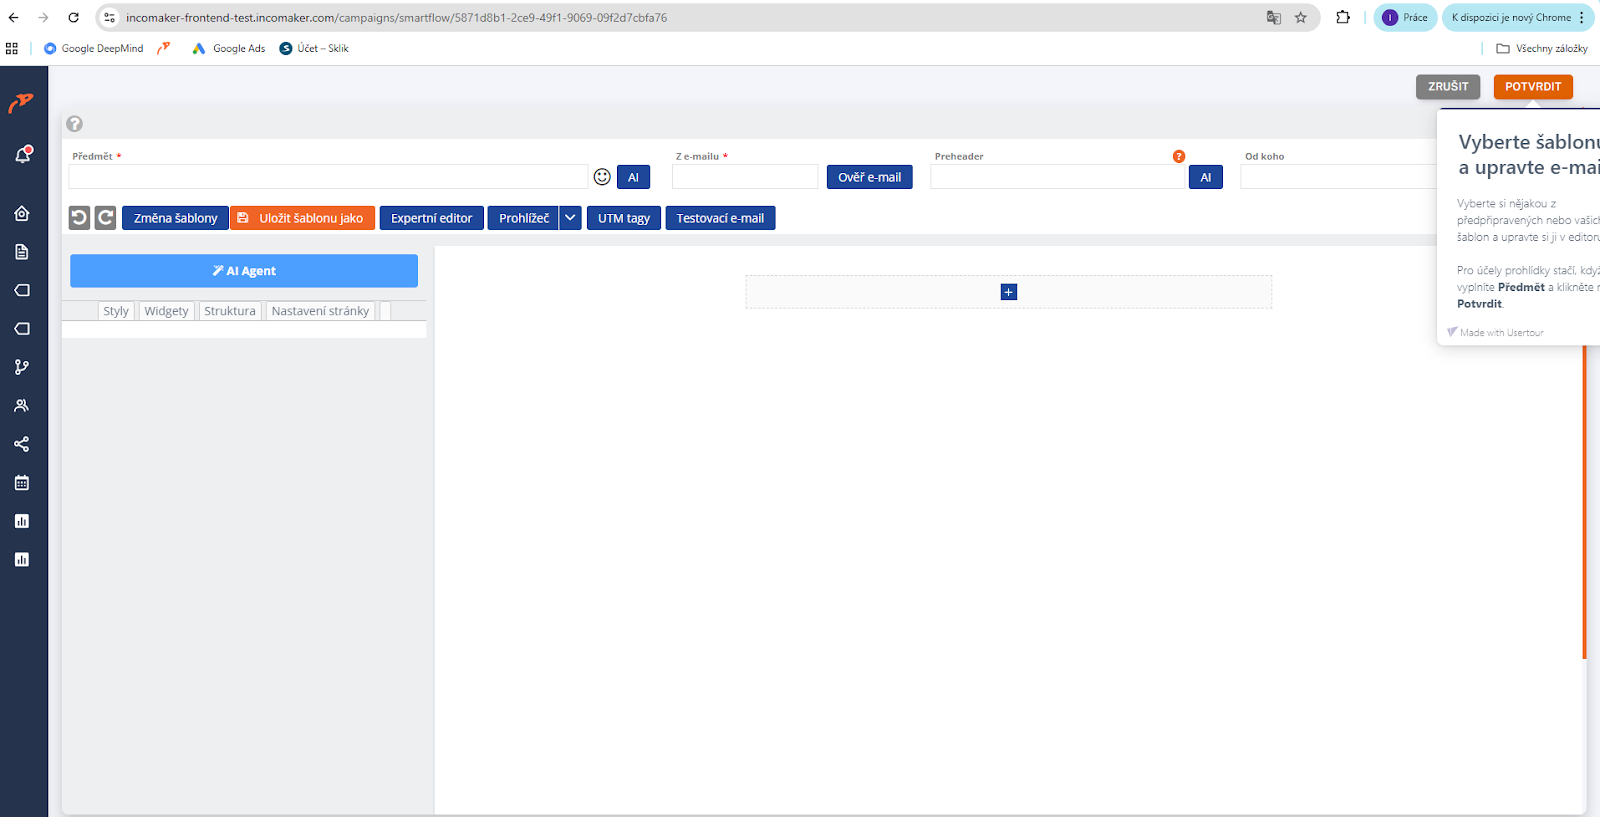
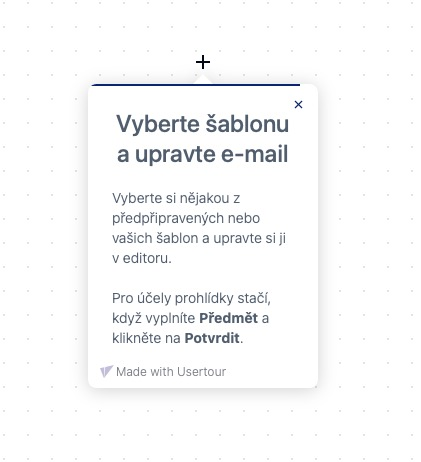
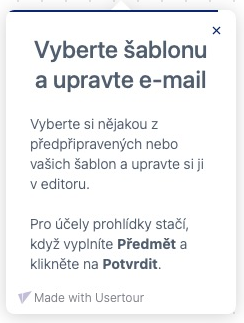
Choose one of the ready-made templates or your own and edit it in the editor.
✔️ for this walkthrough, just filling in the Subject is enough,
✔️ then click Confirm.
13. Final Confirmation
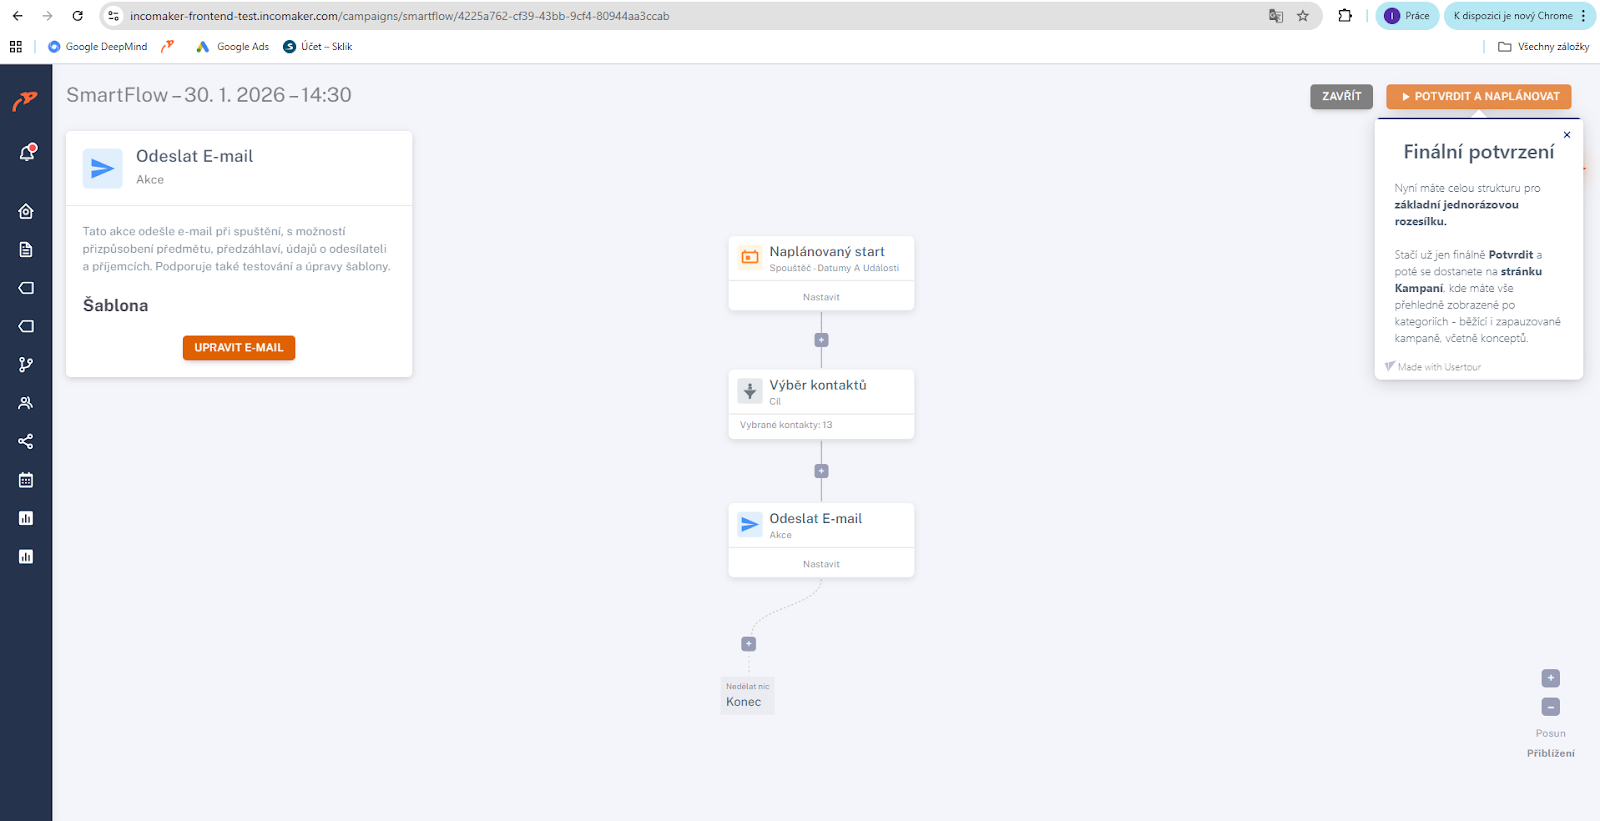
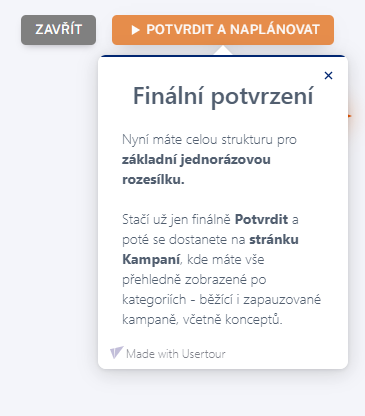
Now you have the entire structure for a basic one-time send.
✔️ click Confirm one last time,
✔️ you’ll then be taken to the campaigns page,
✔️ in the overview you’ll see campaigns organized by category — running and paused, including drafts.
Templates are a key element of communication in Incomaker NEXT.
Using them correctly within SmartFlow helps ensure consistent, clear, and effective communication throughout the entire campaign workflow.
In this chapter, we will focus on how to use templates directly in SmartFlow and how to properly connect them to individual campaign steps.
Templates as Part of Individual Steps
In SmartFlow, templates are used directly within specific campaign steps.
Each step can have its own assigned template based on the scenario you want to implement.
Thanks to this approach:
- you know exactly when and to whom a particular template will be sent,
- you have a clear connection between the content and the campaign logic,
- and you can better control the entire communication process.
Using Templates in Different SmartFlow Branches
SmartFlow allows you to work with multiple branches based on the behavior or characteristics of your contacts.
You can use a different template for each branch to match the specific situation.
This enables you to:
- personalize communication,
- respond to different scenarios,
- and create more complex yet easy-to-manage campaigns.
Template Changes and Their Impact on Campaigns
When editing templates, it is important to keep in mind that:
- changes to a template will be reflected in all steps where it is used,
- a modification may affect multiple campaigns at the same time,
- changes should be made with consideration for the overall SmartFlow context.
Thanks to the clear SmartFlow overview, you always have a clear understanding of where a template is being used.
Checking Template Usage in SmartFlow
Before launching or modifying a campaign, it is recommended to:
- review the entire SmartFlow,
- check that each step has the correct template assigned,
- verify the connections between individual branches.
This helps prevent communication errors and ensures a consistent campaign output.
Recommendations for Effective Template Usage
- Adapt templates to the specific step and scenario.
- Avoid unnecessarily using the same template for different purposes.
- Regularly review template usage throughout the entire SmartFlow.
By following these recommendations, communication within your campaigns will remain clear and effective.
What Comes Next
In the following chapters, we will focus on:
- a summary of the differences between the new and original interface,
- the most common questions when transitioning to SmartFlow,
- and practical tips for everyday use.